|
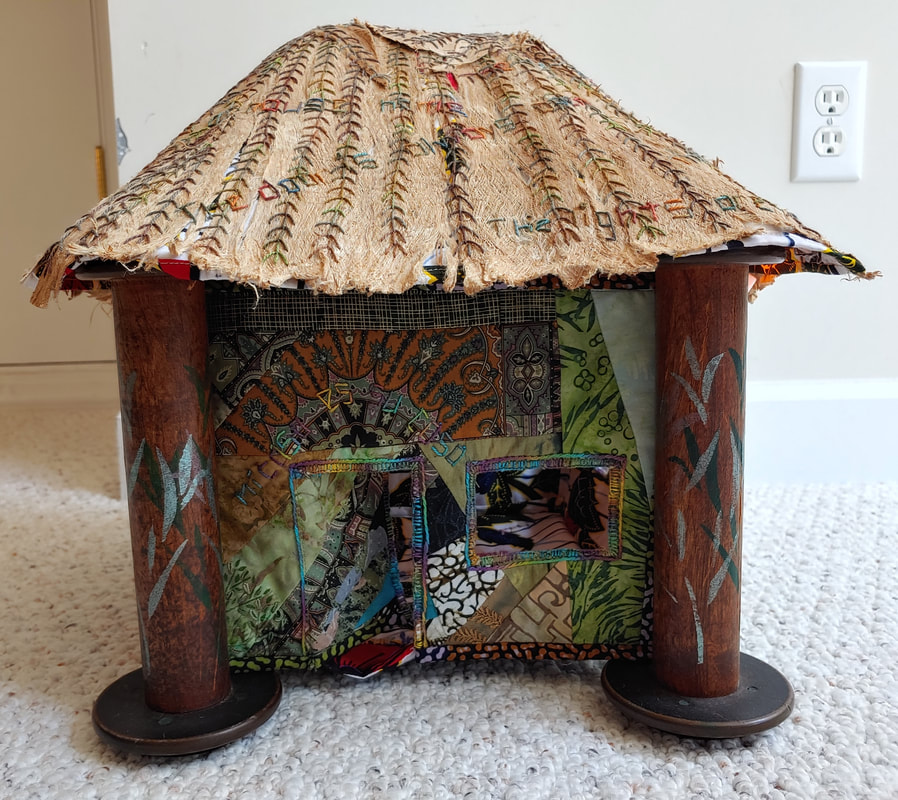
I ended my last blog post with a picture of my latest artwork, "Sanctuary" and a promise to tell the full story in my next post. Today I'll keep that promise. Here's a picture of the piece as I began to bring an idea to fruition.
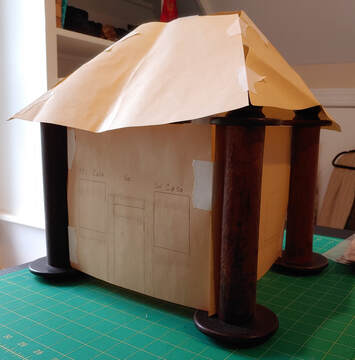
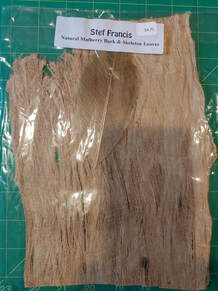
One of the things I had to figure out was how to make sure that it would stand up. I didn't want to make the sides too stiff. I didn't want to totally lose the softness and comfortable feel of a quilt. I also knew I'd want to be able to stitch through the walls to add words and other decorative elements. Luckily, I've had several old wooden bobbins salvaged from a Lowell, Mass. cotton mill sitting on my shelf for years. It occurred to me that they could function as corner pillars/trees/trellises to hold up the sides. So with this much figured out, I began to make the sides. 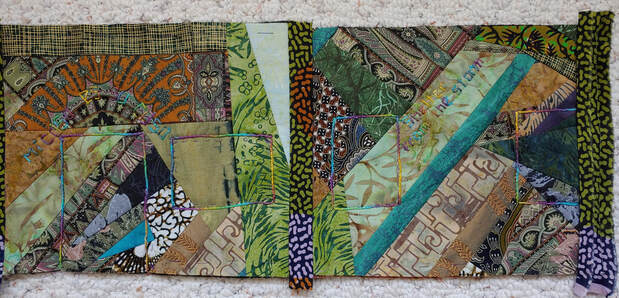 I created each side separately and then added strips at the corner. For the outside walls I used my pieced browns and greens to suggest a humble abode that would blend in with its surroundings. I put a flannel backing behind the pieced fabrics to give some body to them and stitched phrases on each side about my house and home...like "Mi Casa es Su Casa" over the front door and "You are always welcome here" on another side. I knew I was going to leave the door and windows open in my house. When you looked inside I wanted it to be very bright and cheery and welcoming. So I used a bright floral batik for the inside walls and floor. I stenciled more flowers on the fabric and embroidered more words of welcome all over the walls and floor. (See picture a little lower.) To hold the outside and inside walls together, I outlined the windows and door with a stem stitch through all the layers. I used some of my Stef Francis hand-dyed perle cotton to make it look decorative. Once that stitching was done, I cut out the windows and three sides of the door. After putting in the floor, I added tabs with snaps to the top and bottom of each wall corner to attach the walls to the 4 pillars. Then it was time to figure out the roof. I had the basic shape figured out, but wasn't sure how to make it stiff enough to stand up properly. Again, I had to allow for stitching on it. I had more words and phrases to add. For a second time, some of the supplies I've had on hand for years came to my rescue. This time it was mulberry bark (also from Stef Francis).
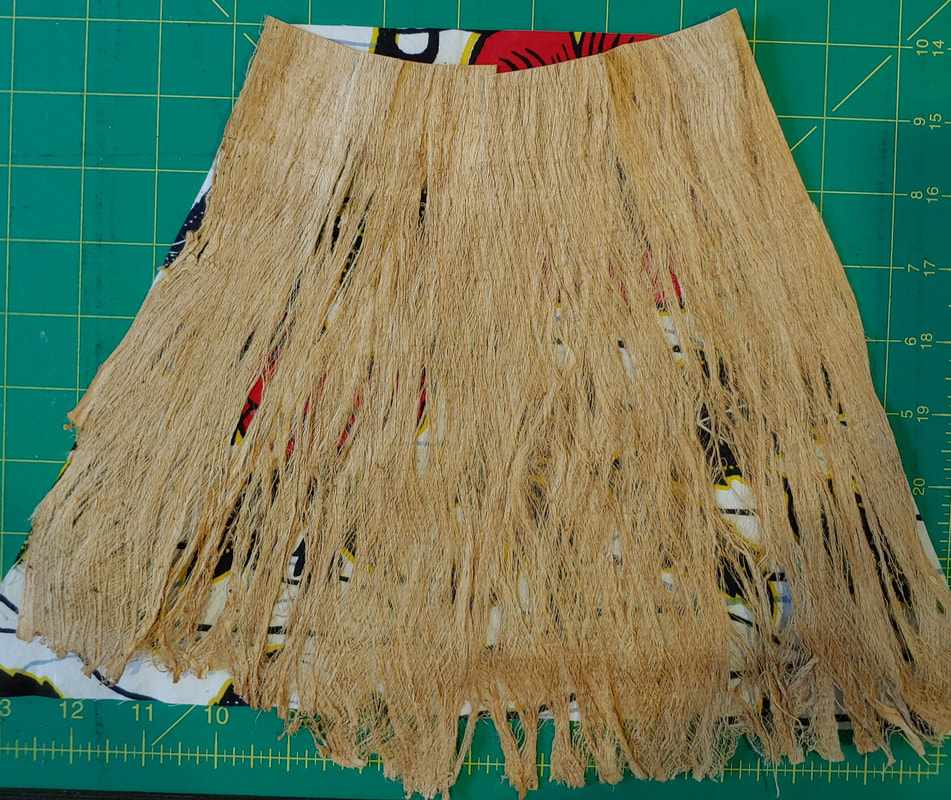
The mulberry bark is stiff, but can still be stitched through. And as you can see from the picture, the structure of the fibers allows you to stretch them apart. By stretching the bottom part more than the top I could just about cover each side of the roof with one piece. Besides having practical advantages, I liked the look of it. To me it suggested a little house in the tropics or an English thatched cottage so it was in keeping with my metaphor. To attach the mulberry bark to the fabric layer, I again used my Stef Francis perle cotton in a fly stitch and more words. I hoped that the mulberry bark alone would give sufficient structure to hold the roof up, but as you can see in the left picture below, it sagged. I ended up adding a support layer constructed from a stiff nonwoven interfacing. That worked out much better (picture on the right.)
With the basic structure done, I was ready for the final decorations. I had already stenciled trees and bushes with embroidered leaves on some of the sides. I added more "bushes" by fusing on skeleton leaves in some places. Then I decorated the side pillars/trees with stenciled vines and finished up with wires and beads to suggest wisteria in the front. When I was nearly done with it and was setting it up to take some photos, I discovered something that I really didn't like. The inside of the house was really dark. It definitely was not projecting the warm welcoming look that I wanted so I realized that I needed to light up the inside somehow. I decided to use those little battery-operated LED tea lights, but had a heck of a time to figure out how and where to attached them. You can see my first idea - and the inside walls in the photo below. 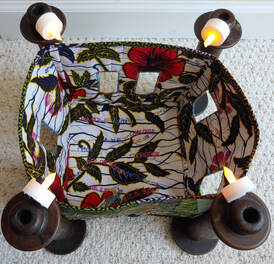 Attaching them to the pillars proved too difficult. I ended up putting little pieces of velcro on the bottoms of the lights and along the inside of the ridge-line of the roof. I wish they lit it up more, but that's a problem for the future. Sanctuary is not high art, but I sure had fun and learned a lot in the process of making it. I hope it will bring a smile to those who see it. Right now it's on display at the Stryker Center in downtown Williamsburg as part of the Williamsburg 2020 Community Art Project where it will be through the end of October. Stop by if you are in the area. It's right below the digital sign that displays a changing selection of poems written by Williamsburg area residents while at home during the pandemic.  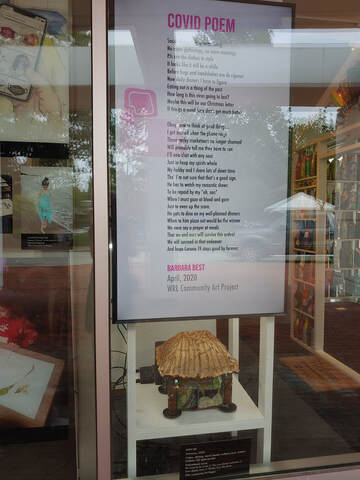
0 Comments
Your comment will be posted after it is approved.
Leave a Reply. |
AuthorMother & daughter, Ann Lee & Sonja Lee-Austin share their joys and struggles in their art and lives. Archives
June 2021
Categories
All
|

 RSS Feed