|
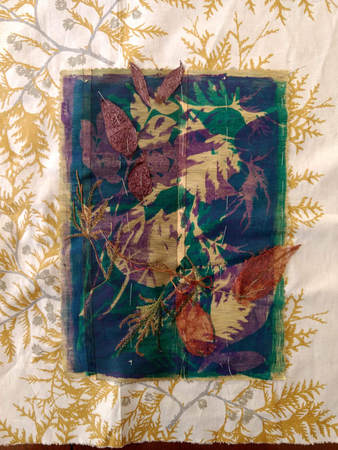
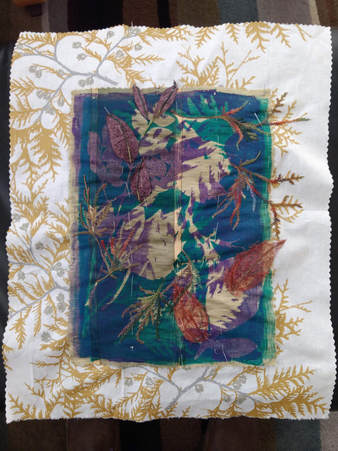
Though it feels backwards to me, I am going to share my work in progress before telling you about what I completed. Writing about them in this order isn't totally backwards as the new one grew from the gelatin printing session I talked about in my last post. So it's sort of like finishing one story before starting the next. Those who know me well, know that I always like to have a handwork project going. It's what I do in the evenings when we are watching TV. I need to keep my hands busy. If I'm not stitching, I'm playing solitaire on my tablet - but stitching makes me feel better. So I like to start something new as soon as I can after finishing a work. Since I'd just done a bunch of prints in my session with Sonja and Tyler, I looked at those first to see if one called my name. Thankfully an idea came together fairly quickly. I decided I liked one of my gelatin prints with a commercial print I've had for a long time. The picture on the left shows the very beginning and the one on the right, my progress so far. (I got a lot of stitching done last Friday - while waiting at Sonja's for a plumber who never showed up.)
The "leaves" I've layered in so far are pieces of some dyed silk cocoons I bought in Vancouver last year. My current plan includes adding a few skeleton leaves as well, but those need to go on near the end so they don't get mangled from the stitching process. I also need to figure out just how I am going to attach them. ...more to come on this one. Looking at it here on the screen is giving me some additional ideas. And FYI - my photography skills are not the greatest - the coloring of the picture on the right is more true to the work. And the finished workThe piece I had just finished was a bit of craziness that I am calling "Let Your Light Shine." This one is a bit out-of-the-box for me, but good follow-on to the one I called "Fighting the Blues." (See my October post.) It started with a gift bag.
And I just kept going, adding stitching, and sequins, and the word "shine" over it all; having a ball with it. Then one day a song playing during my morning water fitness class gave me the title. Everything was coming together fine. I finished all my embellishing and was going to just press it and mount it when a bit of a disaster happened that almost sent it to the scrap heap.
I let the iron get too hot before giving it a final press and when I touched the iron to that papery backing, I melted a good chunk of the edge. It was really a stupid mistake. Luckily the front fabric was fine, but still the gouge was readily apparent. I had so much invested in it at that point I sure didn't want to just scrap it without trying to fix it somehow. So I decided to try to a technique I hadn't used in a very long time--to use my heat gun to distress the edges of the backing material all the way around. It was a bit dicey to do because I needed a Teflon sheet underneath it to protect my ironing board and another between the sheer layer and the backing fabric. I didn't want to melt the sheer fabric. In the end it turned out to be one of those happy accidents. I think the distressed edges work very well, especially the patterning in the Helene Davis hand-dyed cotton that I'd decided on for the background. The finished piece is wild and crazy, but it makes me happy to look at it.
0 Comments
Your comment will be posted after it is approved.
Leave a Reply. |
AuthorMother & daughter, Ann Lee & Sonja Lee-Austin share their joys and struggles in their art and lives. Archives
June 2021
Categories
All
|

 RSS Feed