Friends Fabric Art
  • Home
    • About Us >
      • Ann >
        • Sonja
  • Our Blog
  • Galleries
    • Smaller Art Works
    • Larger Art Works
    • Unlined Jackets
    • Lined Jackets
    • Pillow Covers
    • Hand-dyed Scarves
    • Other Small Items
  • Events & Venues
    • Workshop Offerings
  • Threads of Resistance
    • Creating Word Power
    • Artist Statement

Partners In Art

A Work Completed, Another Started

11/20/2018

0 Comments

 
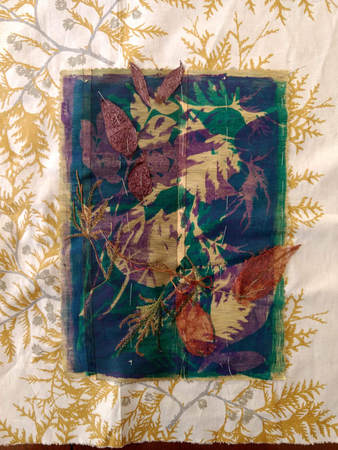
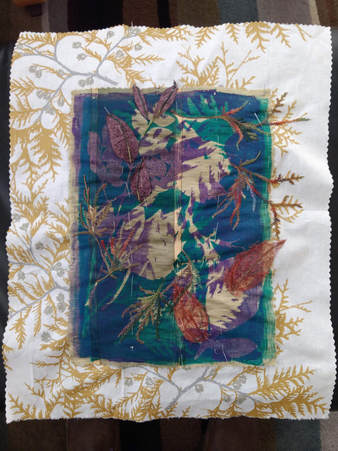
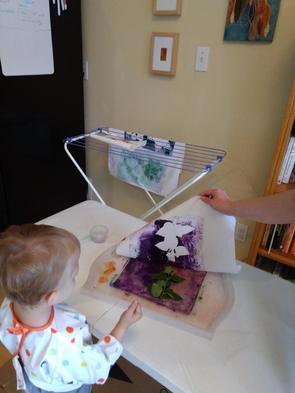
Though it feels backwards to me, I am going to share my work in progress before telling you about what I completed.  Writing about them in this order isn't totally backwards as the new one grew from the gelatin printing session I talked about in my last post.  So it's sort of like finishing one story before starting the next.

Those who know me well, know that I always like to have a handwork project going.  It's what I do in the evenings when we are watching TV.  I need to keep my hands busy.  If I'm not stitching, I'm playing solitaire on my tablet - but stitching makes me feel better.  So I like to start something new as soon as I can after finishing a work.  Since I'd just done a bunch of prints in my session with Sonja and Tyler, I looked at those first to see if one called my name.  Thankfully an idea came together fairly quickly.  I decided I liked one of my gelatin prints with a commercial print I've had for a long time.

The picture on the left shows the very beginning and the one on the right, my progress so far.  (I got a lot of stitching done last Friday - while waiting at Sonja's for a plumber who never showed up.)
Picture
Picture
The "leaves" I've layered in so far are pieces of some dyed silk cocoons I bought in Vancouver last year.  My current plan  includes adding a few skeleton leaves as well, but those need to go on near the end so they don't get mangled from the stitching process.  I also need to figure out just how I am going to attach them.  ...more to come on this one.  Looking at it here on the screen is giving me some additional ideas.

​And FYI - my photography skills are not the greatest - the coloring of the picture on the right is more true to the work.

And the finished work

The piece I had just finished was a bit of craziness that I am calling "Let Your Light Shine."  This one is a bit out-of-the-box for me, but  good follow-on to the one I called "Fighting the Blues."  (See my October post.)  It started with a gift bag.
Picture
The bag had a sparkly sheer outer layer over a paper-like inner layer with the green ribbons pin a casing to make it a draw-string bag.  It picked up the colors in a remnant of another stitching project, so I decided to have some fun and see what I could put together.

I first cut two sides of the bag to get a flat piece and cut off the draw-string top so that everything would be the same thickness.  Over that I layered pieces of my other stitching project.  (One of several I've done where I layered scraps of Maria Testa's hand-dyed silk over a commercial print and then added lots of embroidery.)  I cut the remnant into several pieces to make them fit and create a pleasing arrangement.  Next I cut up the draw-string ribbon and layered that on as well.

At that point I still had the draw-string part of the bag left.  I didn't want to waste any of that shiny fabric, so I pulled out the stitching that created the channel and held the shiny fabric to the papery backing.  I pressed the outer layer and cut it up into small rectangles and layered them on as well.  To my delight,  the shiny spots on the reverse side were silver, not gold, adding an extra bit of pizzazz.
​
Once I completed my arrangement, I basted all the bits together and began to stitch.  First I added words on the ribbons...
"Sometimes you have to go a little crazy
Just start and see what happens
​You ask if I am having fun...I hope it's obvious"
And I just kept going, adding stitching, and sequins, and the word "shine" over it all; having a ball with it.  Then one day a song playing during my morning water fitness class gave me the title.  Everything was coming together fine.  I finished all my embellishing and was going to just press it and mount it when a bit of a disaster happened that almost sent it to the scrap heap.

I let the iron get too hot before giving it a final press and when I touched the iron to that papery backing, I melted a good chunk of the edge.  It was really a stupid mistake. 

Luckily the front fabric was fine, but still the gouge was readily apparent.  I had so much invested in it at that point I sure didn't want to just scrap it without trying to fix it somehow.  So I decided to try to a technique I hadn't used in a very long time--to  use my heat gun to distress the edges of the backing material all the way around.  It was a bit dicey to do because I needed a Teflon sheet underneath it to protect my ironing board and another between the sheer layer and the backing fabric.  I didn't want to melt the sheer fabric.  In the end it turned out to be one of those happy accidents.  I think the distressed edges work very well, especially the patterning in the Helene Davis hand-dyed cotton that I'd decided on for the background.

​The finished piece is wild and crazy, but it makes me happy to look at it.
0 Comments

Passing Along the Joy

11/13/2018

0 Comments

 
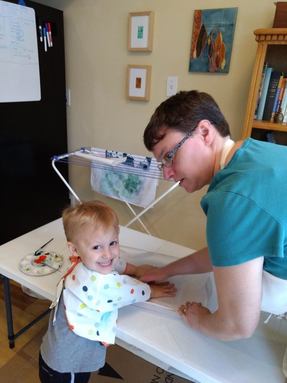
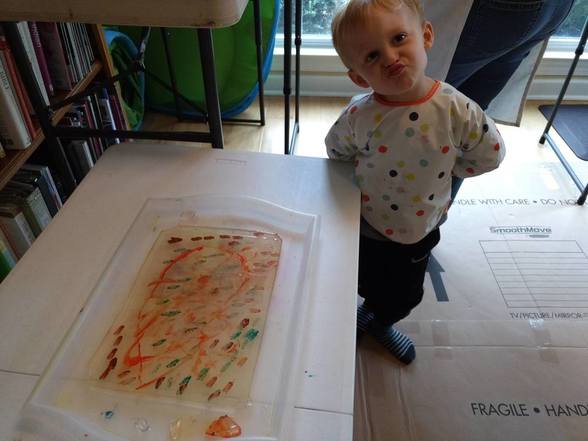
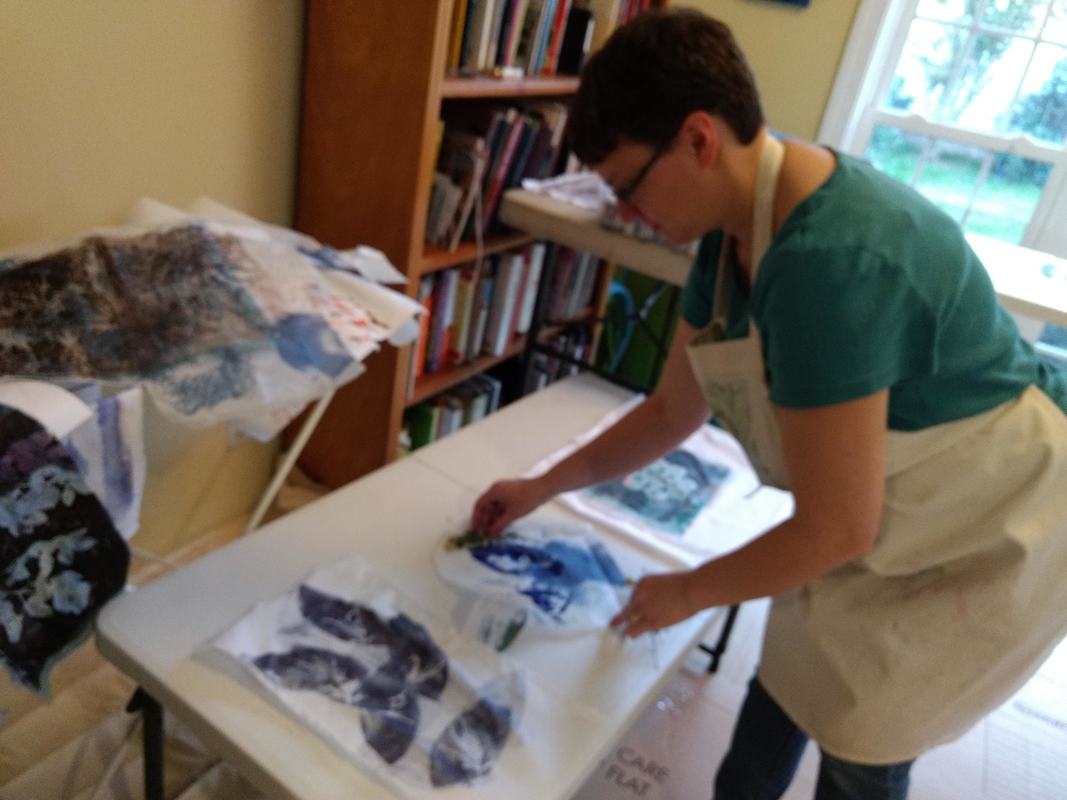
I've mentioned several times now how happy Sonja and I have been with our weekly Art Nights.  We meet at the library to stitch and share.  Since Sonja had the day off yesterday we met at her house instead of the library.  That meant we could do something more involved than stitching, but it also meant involving 3-year-old Tyler.  So yesterday we introduced him to one of our favorite messy projects--gelatin printing.  He loved it and we had a blast.
Picture
Tyler doesn't like to get his hands messy so this was a good project for him.  He liked choosing paint colors and using the brayer to spread them. Of course he always wanted to use more than one color.  Sonja was very good in not censuring any of his choices, just explaining what color would result.  So he'd be rolling away saying "I'm making purple."

He also took great delight in choosing from the leaves I'd brought for making designs. (Here in Virginia there are lots of evergreens and other plants that still have their leaves, so we had a very good variety available even now in November.) He was good at helping to smooth out the papers and his joy at seeing the results is still warming my heart today.  We heard him say "Wow" often yesterday.  At every stage he just dove right in.
I'm sure Sonja would agree that it adds a whole new dimension to share something you love with a new generation and to have them respond with such delight.  He was expressing out loud all the feelings that we were also having as we went through the same processes.

Making art with others is something I have missed since our move.  Though I have joined a couple of art centers/galleries here, the focus is really on exhibiting rather than making art. Our previous art home, Western Avenue Studios, provided a unique experience of creating art as part of a community  that can't really be replaced.  That said, making art with your family is a different kind of awesome, irreplaceable experience that I am so grateful to have.

When your grandson covers his gelatin plate with paintbrush marks and says "Look I'm making paw prints...what a great idea!"  it just doesn't get any better.  Especially when you've made some papers and fabrics of your own that you're pretty delighted with ...
Picture
Picture
Tyler's "Paw Prints"
Picture
Sonja's Leaf Prints
Picture
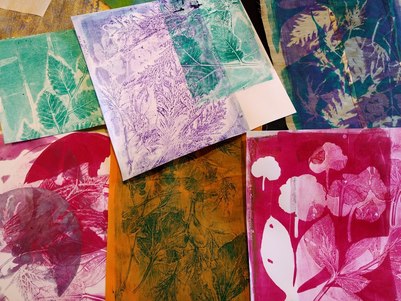
Some of the prints I was most pleased with.
0 Comments

    Author

    Mother & daughter, Ann Lee & Sonja Lee-Austin share their joys and struggles in their art and lives.

    Archives

    December 2020
    October 2020
    September 2020
    August 2020
    June 2020
    May 2020
    April 2020
    March 2020
    January 2020
    December 2019
    November 2019
    October 2019
    September 2019
    August 2019
    July 2019
    June 2019
    May 2019
    April 2019
    February 2019
    January 2019
    December 2018
    November 2018
    October 2018
    August 2018
    July 2018
    June 2018
    May 2018
    April 2018
    March 2018
    January 2018
    December 2017
    November 2017
    October 2017
    September 2017
    August 2017
    July 2017
    June 2017
    May 2017
    April 2017
    March 2017

    Categories

    All
    Art Quilts
    Embroidery
    Fiber Art
    Silk Art
    Textile Art
    Threads Of Resistance

    RSS Feed

Proudly powered by Weebly