|
Sonja here this time. I've been pondering Mom's questions about the website and blog. The idea of revisiting some of our previous work intrigued me. I started to get excited about this question:
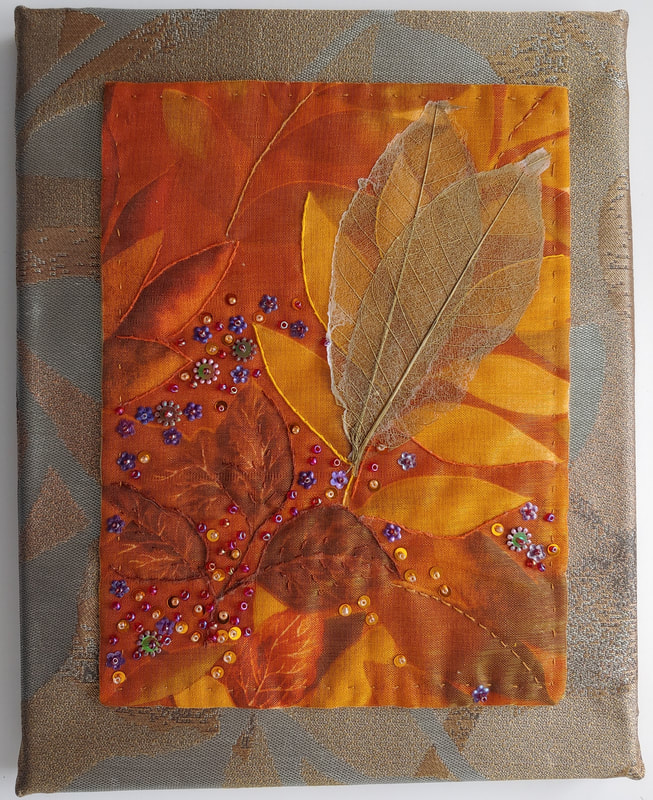
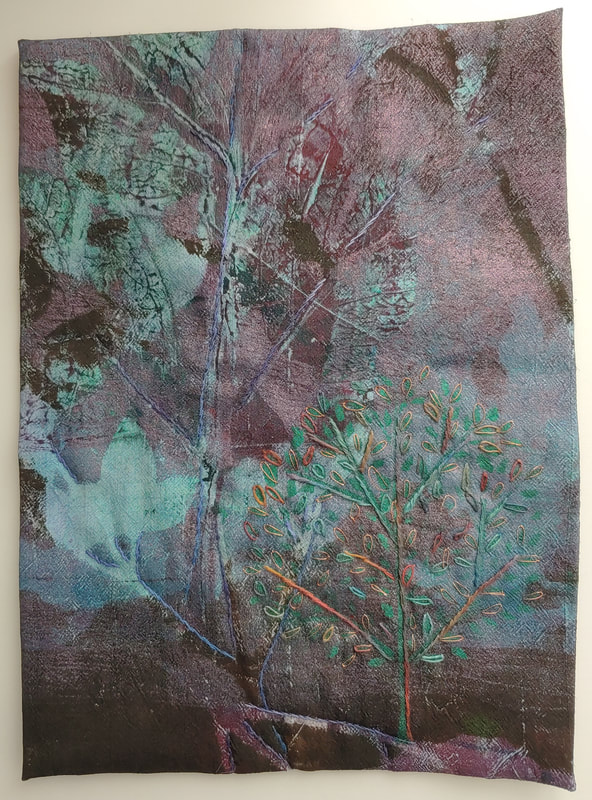
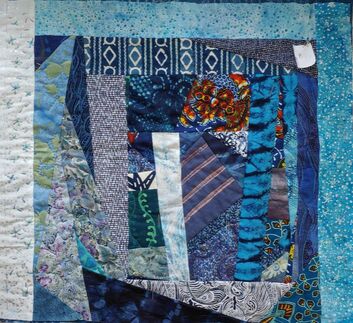
Mom and I made a trip to Artistic Artifacts in Alexandria, Virginia to get it. We visited a bit with July Gula, the owner, and splurged on fabric, thread, and books in addition to getting the beautiful new sewing machine. The machine has amazing technology called the "Bernina Stitch Regulator" to make free-motion stitching more precise. It allows you to draw with the machine while the stitch regulator controls the stitch length. I've been practicing free-motion stitching by making a robots lap quilt for my son Tyler who loves robots. It's ok if my stitching isn't perfect because Tyler will most likely use the quilt for making forts and drag it around on the floor. I found the robot fabric on the Spoonflower website. 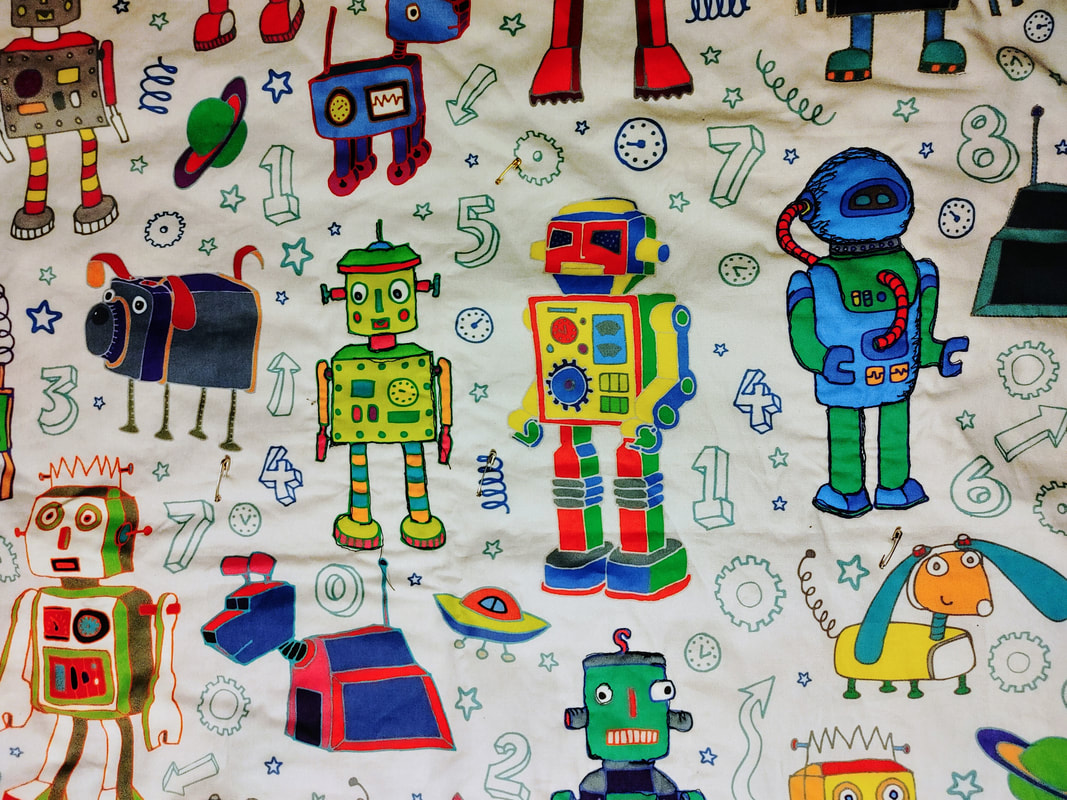 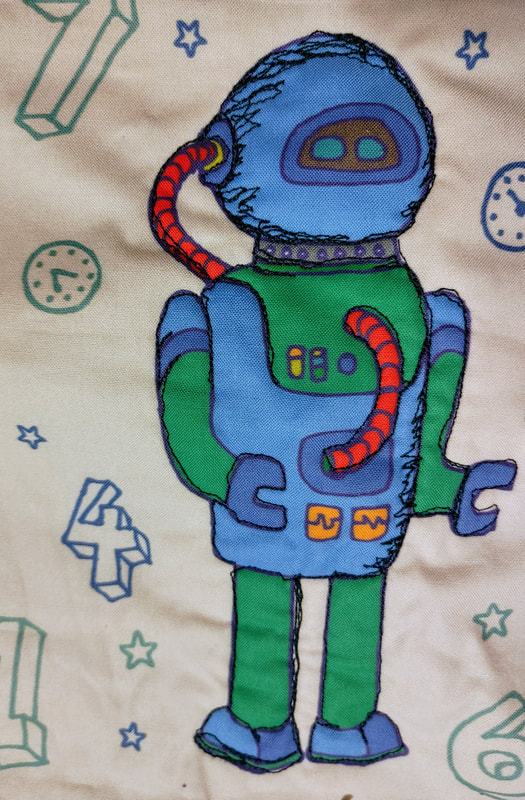 I also spoiled myself with new stained glass materials and tools. My first project with the new supplies is below. I have some other circular drawings that I plan to make stained glass pieces with as well. Circular drawings without mandala-type symmetry have been a recurring theme for me lately. Flowers are a great inspiration. I've been photographing some stunning flowers that have popped up in our garden. such as the vibrant tulip photograph below. When we got our house in Williamsburg, Virginia, it already had a well-established cottage style garden. I'm learning slowly how to take care of it and work around the hot summers here. I have no interest in weeding when it is 90 degrees outside. 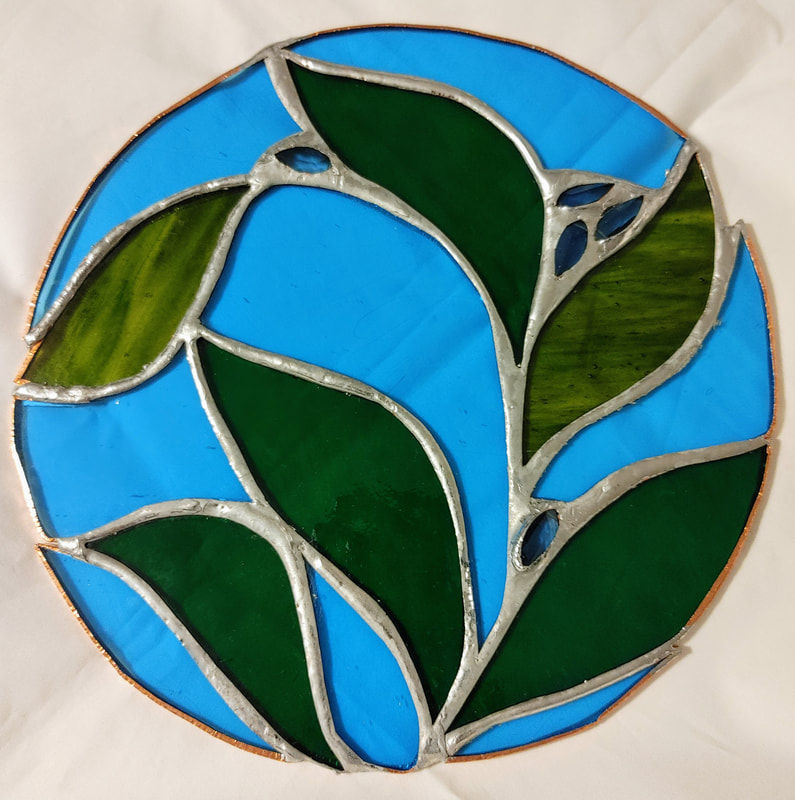 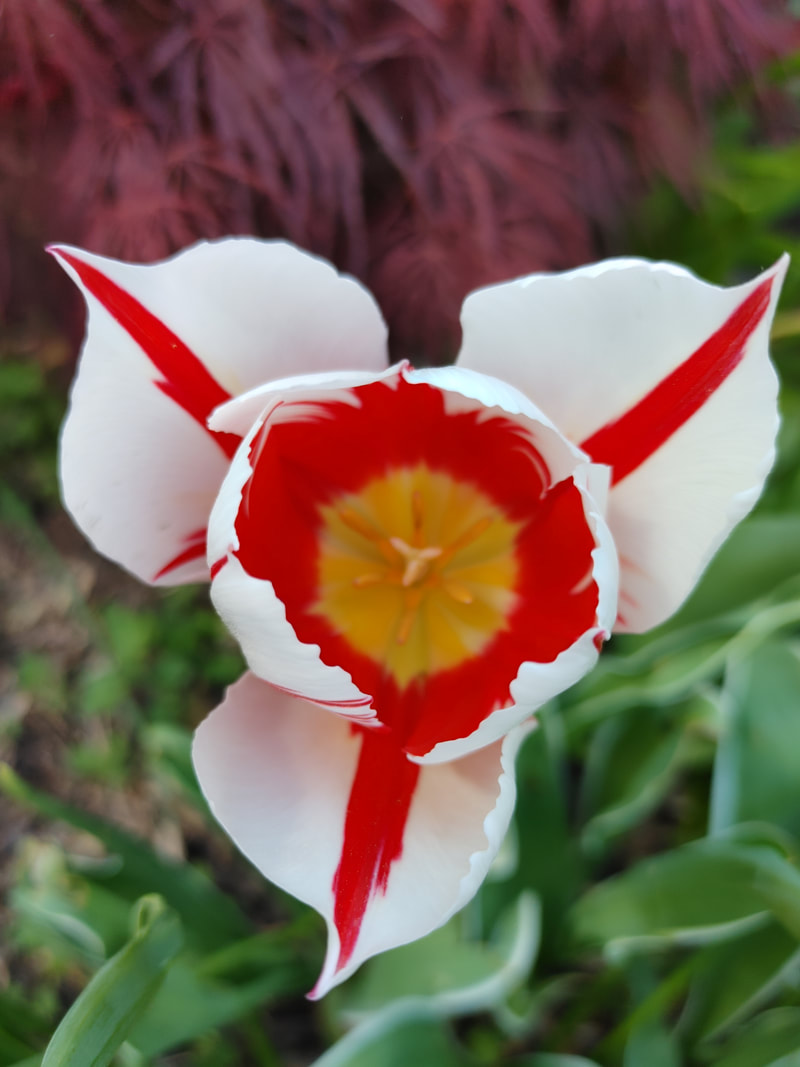 Most of my projects are still in progress, but I finally finished up the art quilt below made with really elegant kimono fabric. The background fabric has silver threads woven through it. I've lost track of exactly when I started this piece. I got the background kimono fabric at the 2009 Surface Design Association Conference so it has taken me over 10 years to decide what to do with the fabric and then finish an artwork with it. 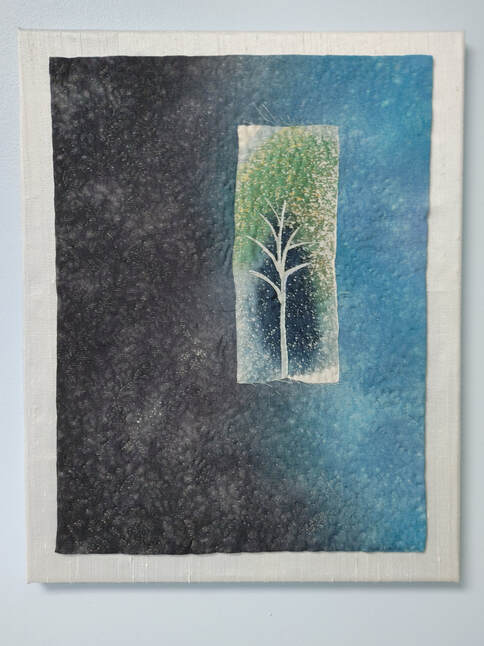 Other bits and bobs that I have started range from more small free-motion stitching practice pieces to quilting with fabric with artwork by Alaskan artist Barbara Lavallee to a small piece reminiscent of a kid's camp God's Eye project to a mandala-type beading project. Hopefully these won't all take over 10 years to complete, but there's no rush. Keep creating! Sonja
1 Comment
I've been thinking a lot about this blog and our website lately. Obviously I haven't gotten any further than thinking - my last post was almost six months ago. I've been considering what to do with them. What do I have to share? What might you be interested in seeing? I hope if you have suggestions, you'll share them in a comment or an email. I am definitely interested in your ideas. Now that I have been working on bigger projects and am not doing art fairs any more, it's not very often that I have something I feel an urgent need to share. Today is an exception. I'll get to that in a minute. First, here are a couple of ideas I've been considering about reorganizing/redoing the website and blog:
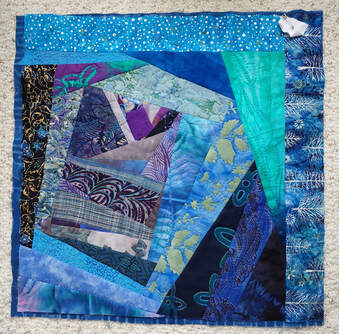
In the meanwhile, here's what I have been working on.  I've gotten faster. This one took 6 months, not 9. I got a little less carried away with the embroidery. Plus I had lots of time to work on it when I was supervising Tyler's school. (Thankfully he's been able to go back to school. It makes me so happy to see how he's blossomed now that he's around other children his age.)
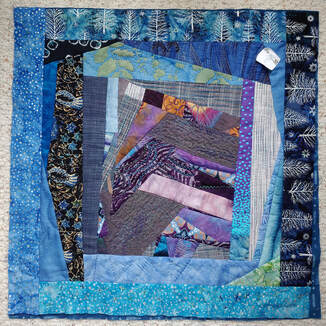
The quilt is an archive in itself. Sonja created all the center square fabrics as she tried out and demonstrated various fabric dyeing and painting techniques. The rest of the fabrics are mostly ones we've collected at various shows we've been to over the years. I hope that as she looks at it each day she'll have fond memories of the time we've spent together making art. Next it's my son's turn. I've gotten a start. I'll make that the focus of the "In Progress" blog or web page once I decide what to do (and get photographs of the pieces already finished). Cheers. Ann I have some unexpected time this week, so I decided I'd post an update on recent projects. Tyler's at home with Sonja this week because there have been some Covid cases at the school where Nick teaches. We're watching and waiting, trying to stay as safe as we can. Supervising Tyler for kindergarten is mostly fun, but also exhausting. It doesn't take all of your attention all of the time, but pretty close. About the only thing I've found that I can do while he's "in" school is hand-stitching. I can pick it up and put it down a million times without losing my place and it doesn't require full concentration. So that's what I've been doing for the last several weeks. Because I've been stitching several hours a day for weeks, I have actually finished the king-size quilt I wrote about early on in the pandemic. It took nearly 9 months, but I actually thought it would take even longer. It didn't feel like an unending project. Still, I'm glad it's finished and that I'm happy with how it turned out. 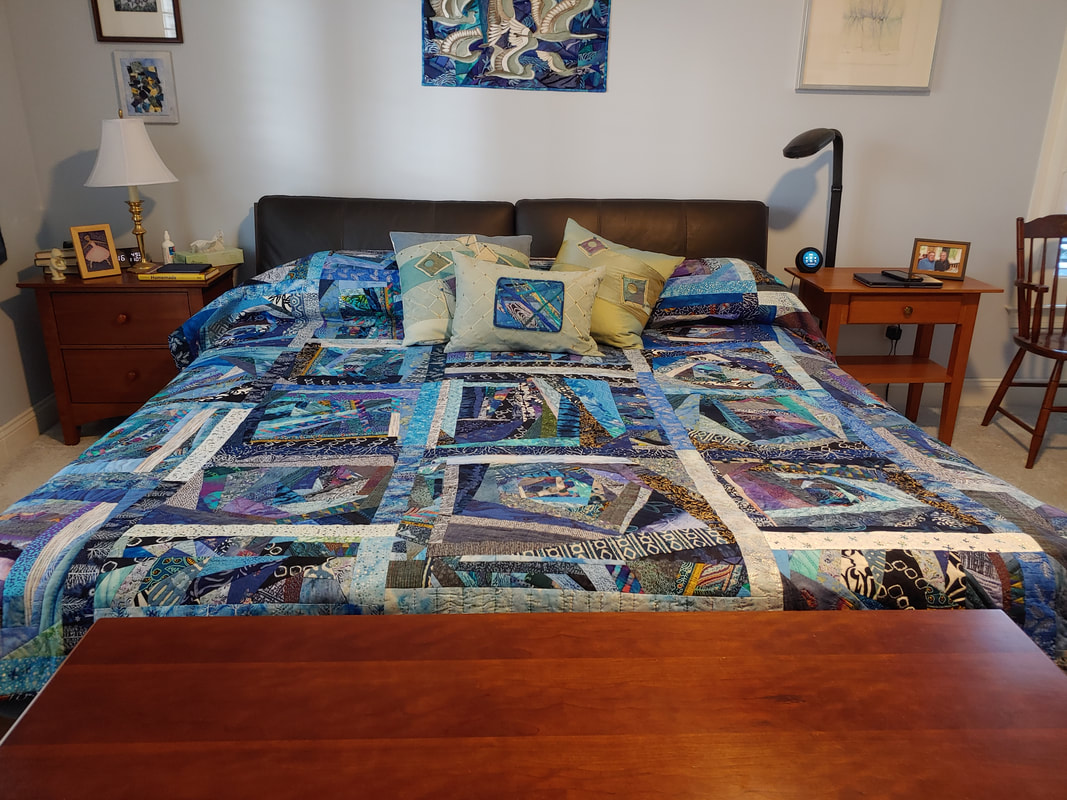 I learned a lot doing this and really enjoyed the process. I went crazy with the embroidery but I never got bored working on it. Clearly it was worth it because it makes me happy to look at it. So, I may be nuts, but I've started on another. This one's for Sonja. I'm still doing my crazy piecing and quilting it by hand using the quilt-as-you-go method, but it's a little different. To make things easier, I have made all the squares the same size this time. I'm also concentrating the embroidery in the center of the blocks and doing standard had-quilting for the rest of the block. Also, this time I'm using a square in the center of each block. When I was digging through my stash to find fabrics for this one, I found a bunch of fabrics that Sonja had dyed years ago for samples or sale for Friends Fabric Art. When I piled them all up, I realized that I had enough to use as the centers for the blocks. I can't tell you how excited I was when I figured that out. It will have such sentimental value for her (and me). Here's the start of the first block. When all put together, the center squares will not be set square, but will go every-which-way. 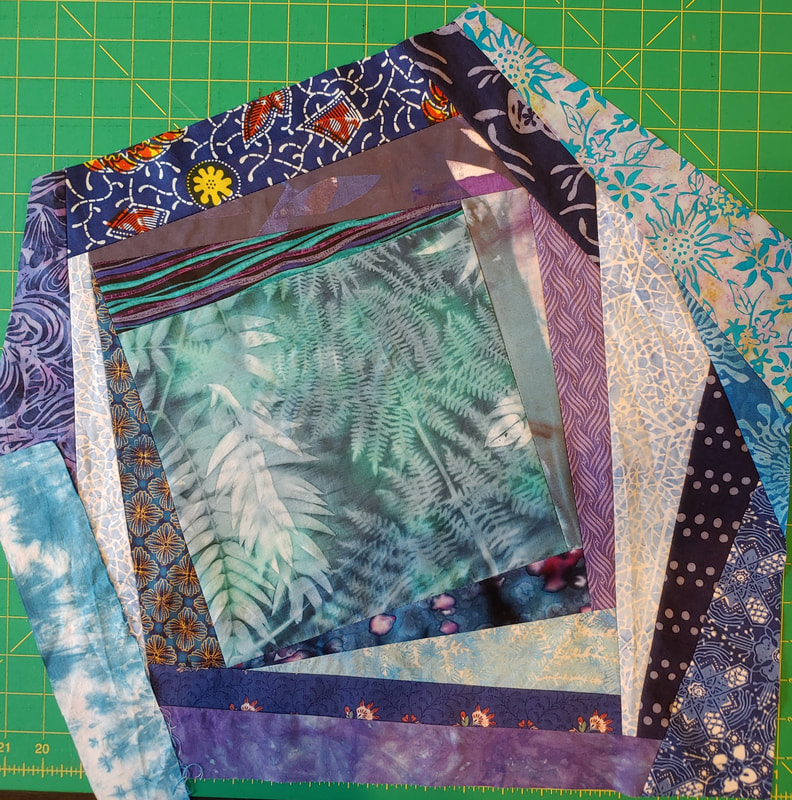 I'm working in blues, purples and greens this time--similar to last time, but little different. As usual, I go pretty crazy in what fabrics I include. I try to make sure that each selection works with the fabrics next to it in some way and that when I look from a bit of a distance nothing stands out like a sore thumb. Though I've learned over the years that all the crazy patterns eventually settle down and work together as you add more and more. Still I always go through stages of nervousness, worrying that I've gone too far this time. Yesterday was one of those days. I've got 6 squares either finished or pieced, so I laid them out on the floor to see what I had. 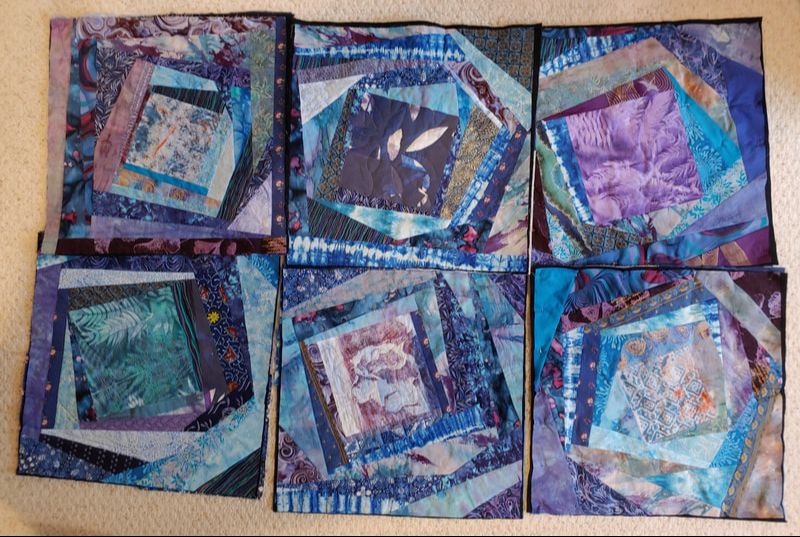 Seeing them altogether was enough to settle my fears again. I could see that, arranged carefully, they would come together just fine. I'll keep plugging along. Stitching, stitching, stitching... I'll leave you with one last update. Our collaboration (Sonja, my sister Sue and I) continues unabated. Here's the latest batch of completions. 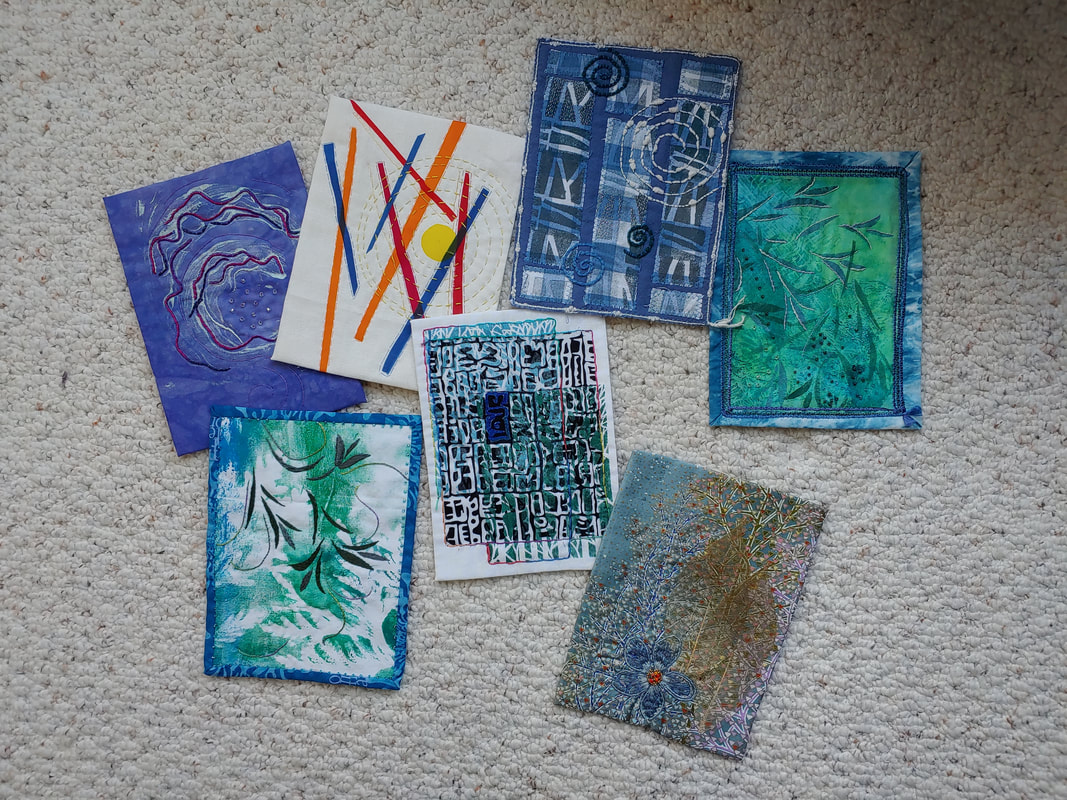 Here's hoping you have happy, healthy, safe holiday season.
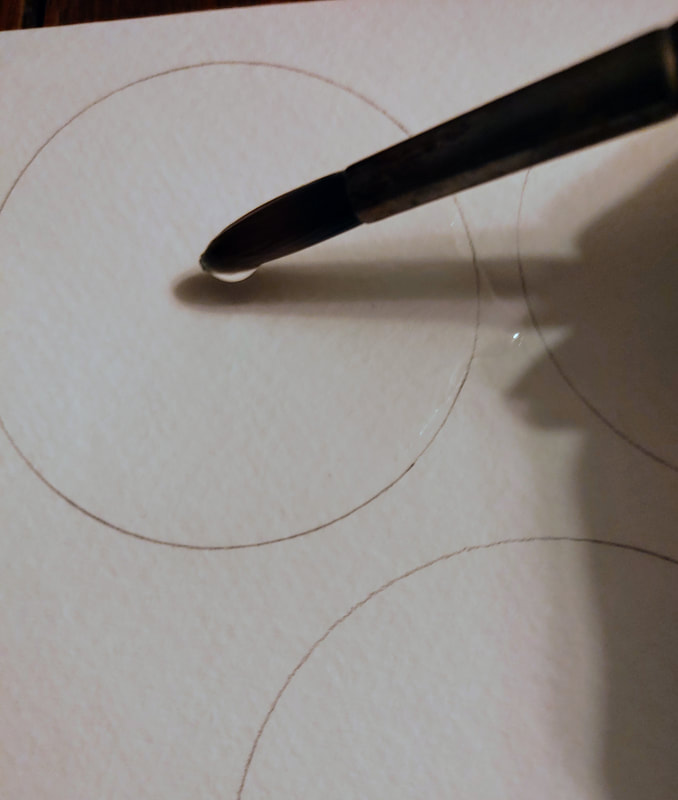
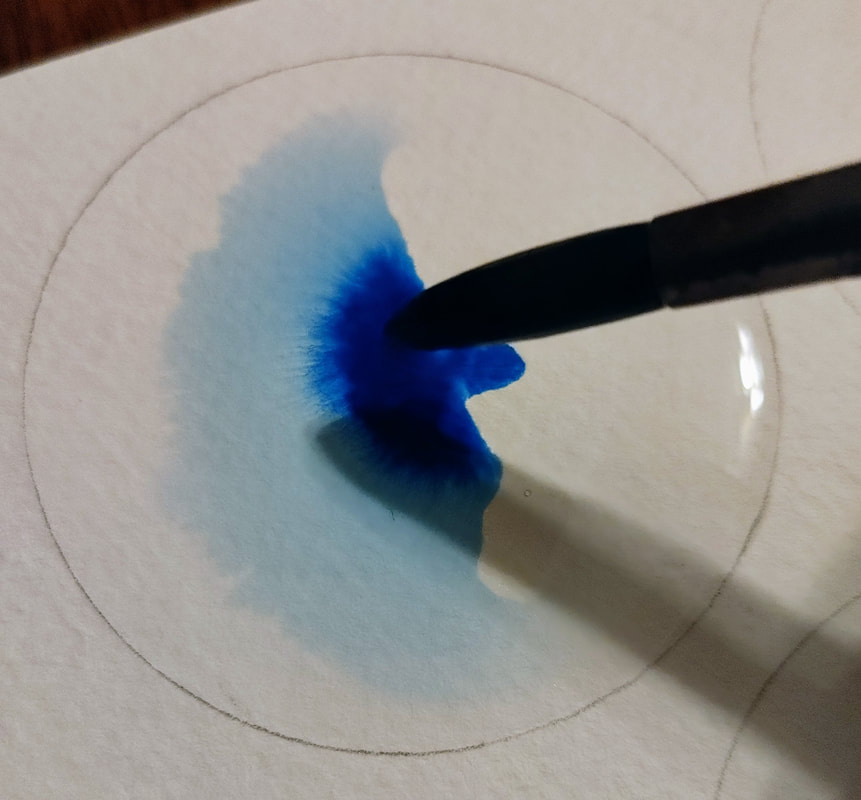
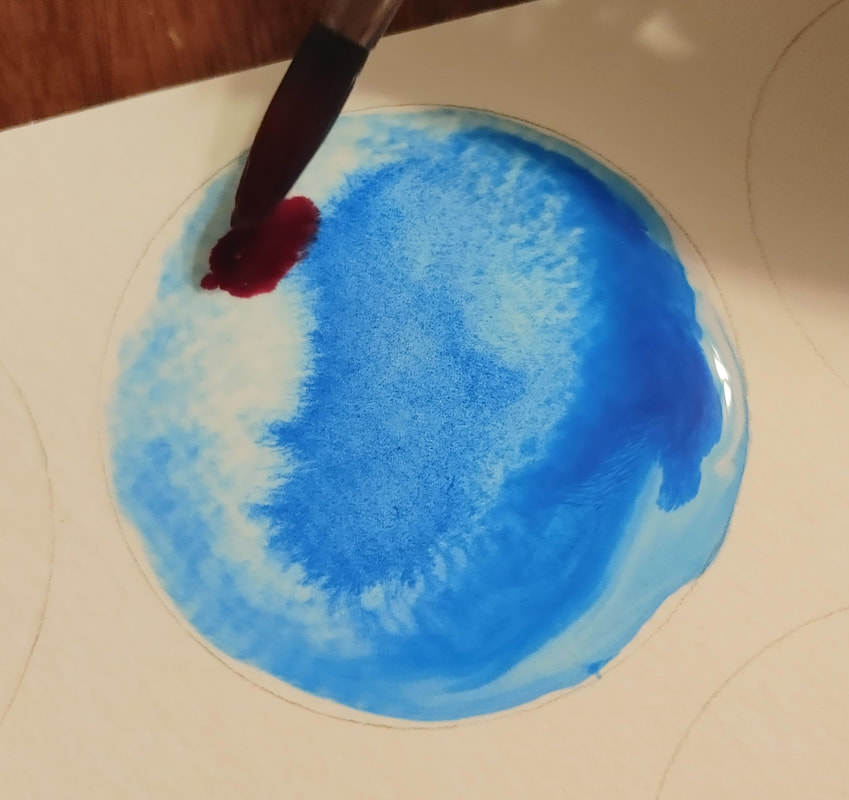
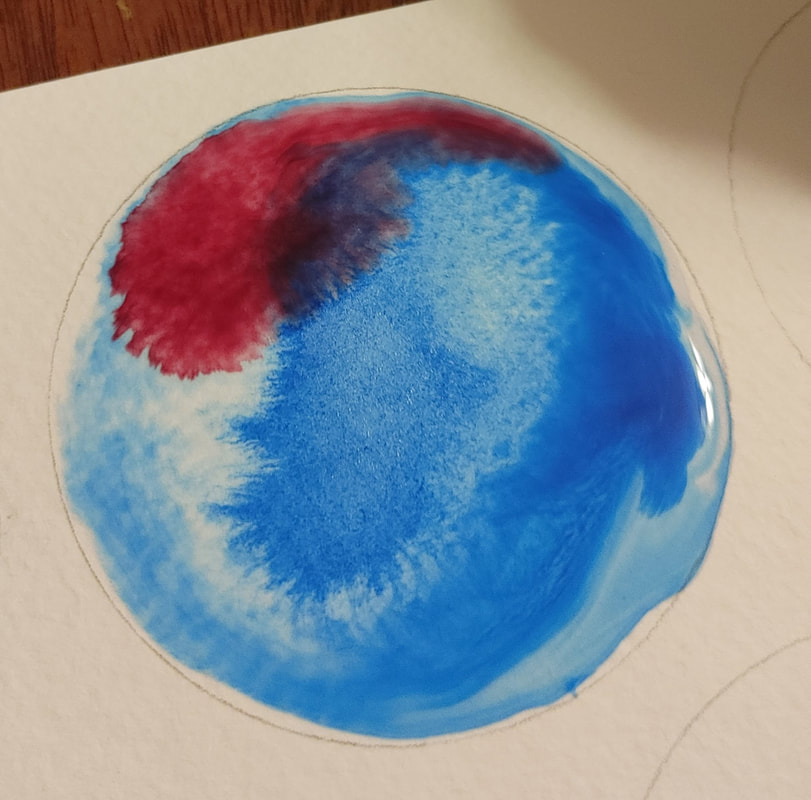
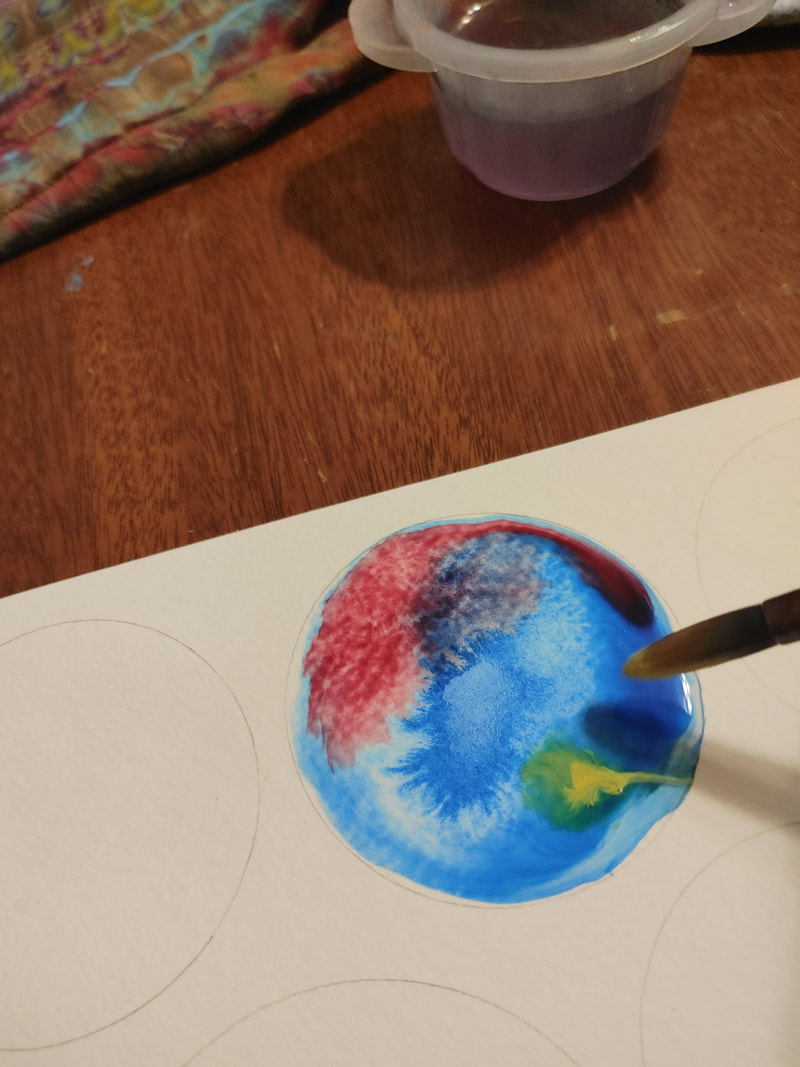
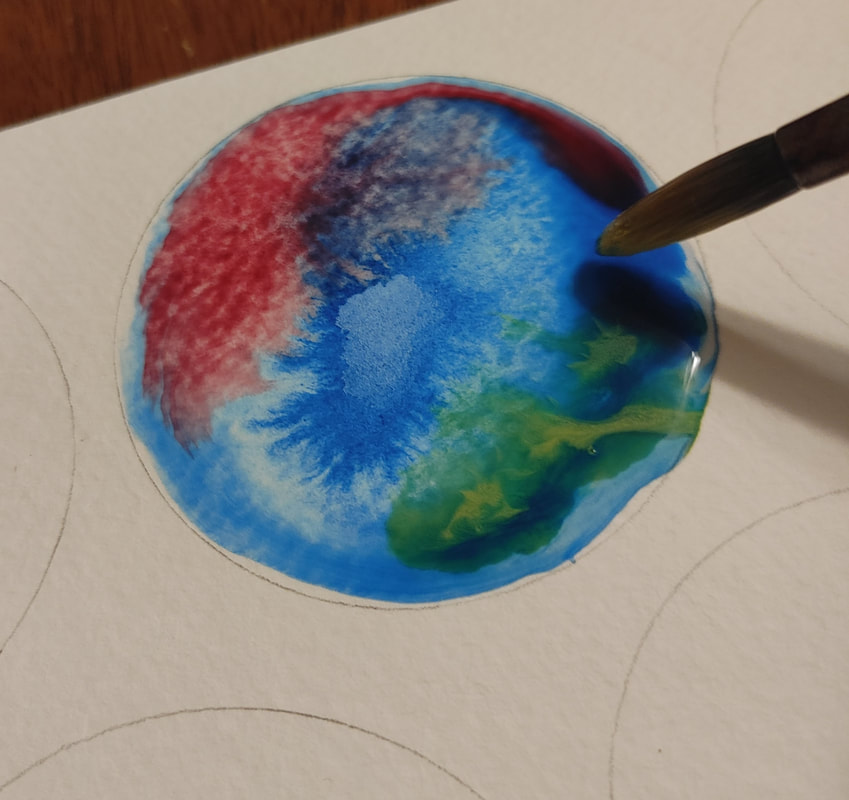
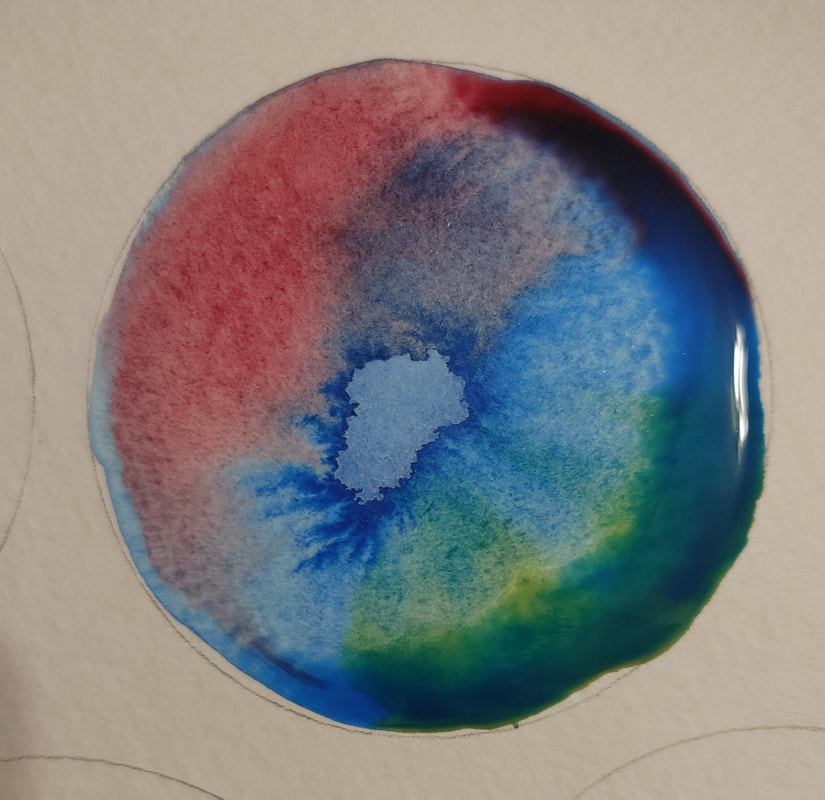
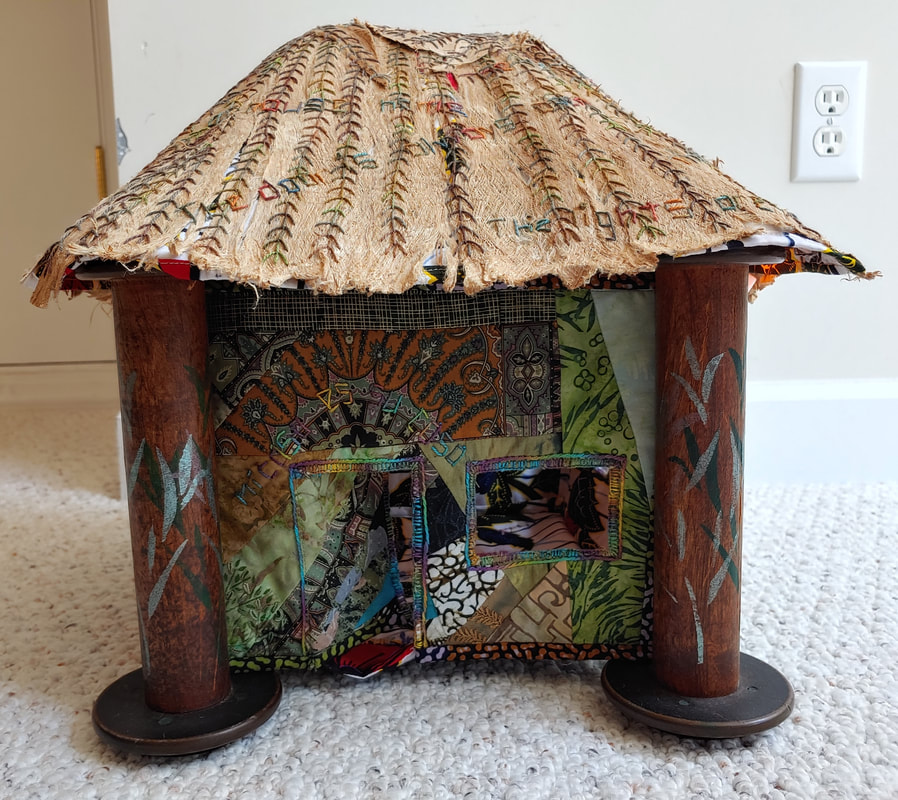
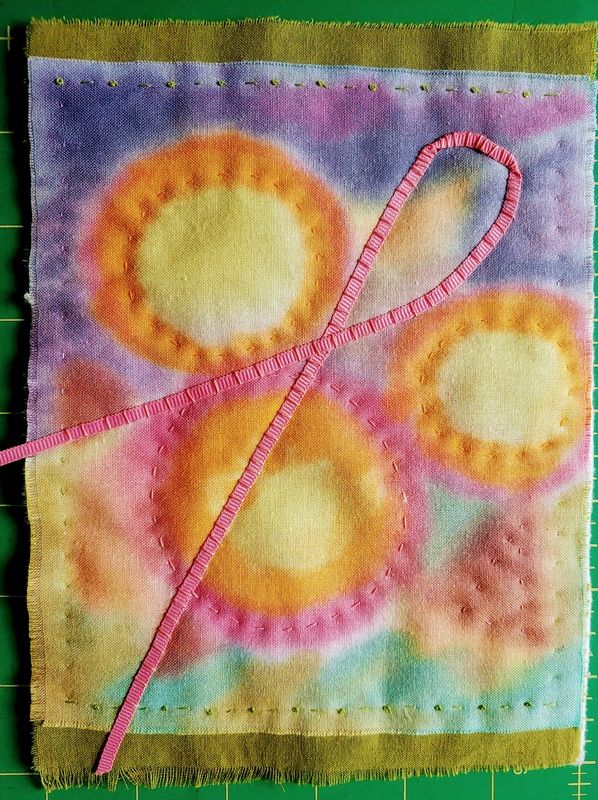
All our best to you. Ann and Sonja What's that saying...life is what happens when you are making other plans??? Boy, it sure applies these days. So many plans have been pushed to the side these last several months and I'm doing things I never would have imagined at the start of the year. I sure would never have guessed that I'd be playing kindergarten teacher for my grandson Tyler at this point. Talk about trying to teach an old dog new tricks...that's a whole 'nother story. Sometimes you know it's just the timing of your plans that's going to change. Other times you realize that you need to totally rethink your plans and decide what you really want. Sometimes you start out thinking that just the timing of things is going to change, but then you realize you really have to let go of that idea. Sometimes that's easy, sometimes it's hard. Giving up cruise vacations was a no-brainer. Deciding what to do in the face of all the cancelled art shows has given me sleepless nights. I finally decided that I am going to retire from the art business. Needless to say I won't stop making art, I'm just going to stop trying to sell it. Other than a couple of stores that carry my free lace scarves, my sales are almost totally dependent on art fairs. Realistically I expect that it will be 2022, before the Covid-19 virus is under control enough that I would feel comfortable doing fairs again. That's just too far out there to keep it as a goal. It was great while it lasted, but now it's time for something else. So what does this mean? The primary change is that I will be shutting down our Etsy shop by year end. If there is something you want, order it soon. I will not be renewing the listings that expire so items will slowly disappear. At the end of the year I'll take down anything left and close it up. Until then, I'll leave pictures of expired items up on our website. If you happen to see something you want, but the link to Etsy doesn't work its listing has expired. In that case, send me an email we'll work out payment and shipping methods. For the foreseeable future we will keep the Friends Fabric Art website and the blog so we'll have a means to keep in touch. Sonja and I will continue to post as the spirit moves us, sharing our most recent projects and updating ongoing efforts. So once more Friends Fabric Art is changing with the times, hanging on in a new form. We are grateful for all the friends we've made over the years and anxious to keep those connections. We appreciate your support and always welcome your comments. All my best, Ann And a PS - The collaborative project among Sonja, me and my sister Sue is still ongoing. Here's a sample of what's been completed recently. More are underway. 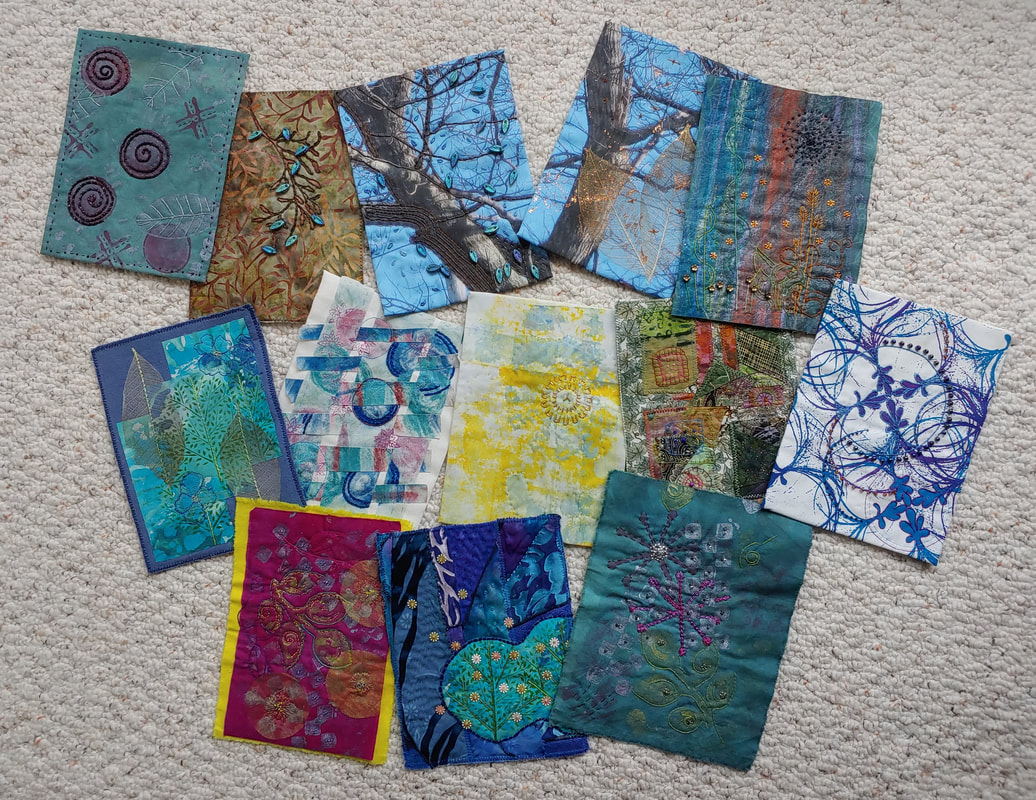 Playing with watercolor paints and water on paper has been peaceful and soothing lately which we could all use more of in these wacky times. I'm enjoying a technique of watercolor painting that I learned from my Saint Olaf College art professor, Wendell Arneson. I'd been using watercolors more like acrylics before his class. I wasn't really using their special affinity to water. The paint will only go where there is water. Paint will float around in a puddle mixing colors in interesting ways similar to creating marbling patterns. I start by tracing circles because I seem to have a circle obsession lately. Then I either wet a circle or create a puddle of water in a circle. Next step is to get your paint brush wet and full of a color from the paint palette and then lightly drop the color into your wet circle. Watch the color spread. Add more of the same color or more water if you like. Then move on to another color and drop it into another spot. Keep repeating until you have added a few colors. Key point is to know when to stop before the painting gets too muddy. Doing specific color studies with just a few colors helps to keep from going overboard. From Wendell's Color Design class, we learned to study colors found in other artworks, magazines, or just about anything. For my color play, I have been experimenting with the color combinations in Carter Smith's shibori fabrics. A photograph of one of his dyed silk scraps is on the right below although my photo does not do the colors in the fabric justice. (That's what I get for taking a photograph at night under yellowy light bulbs.) 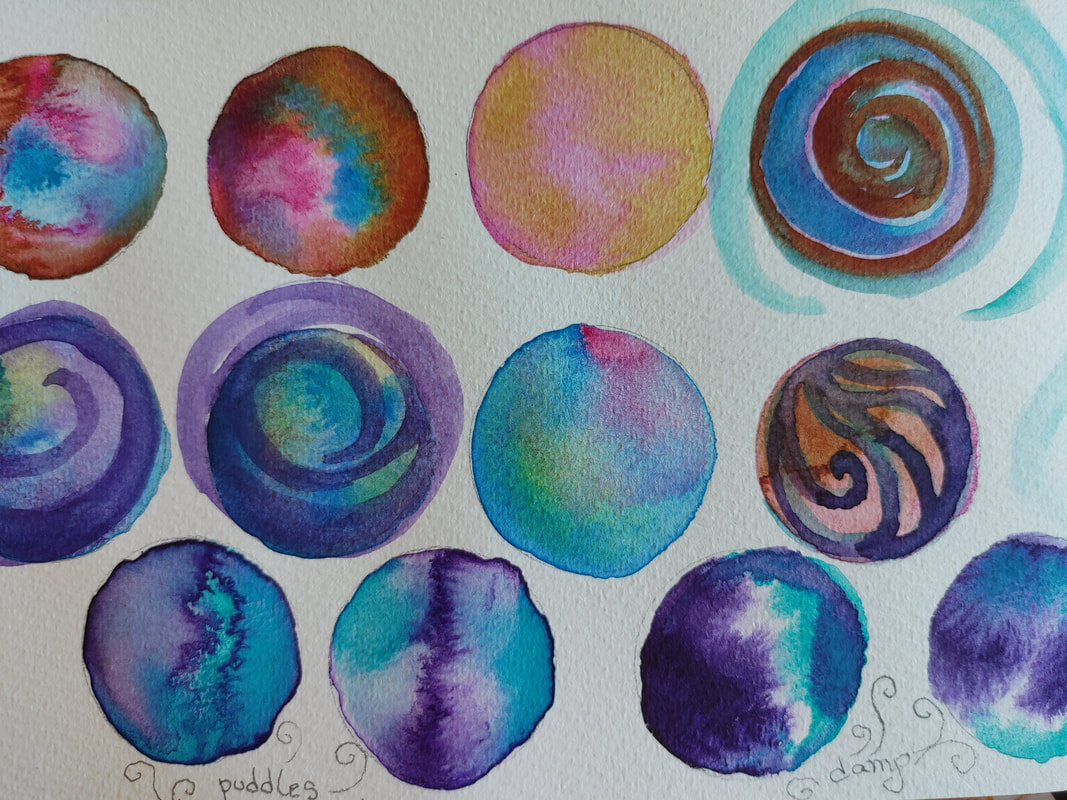 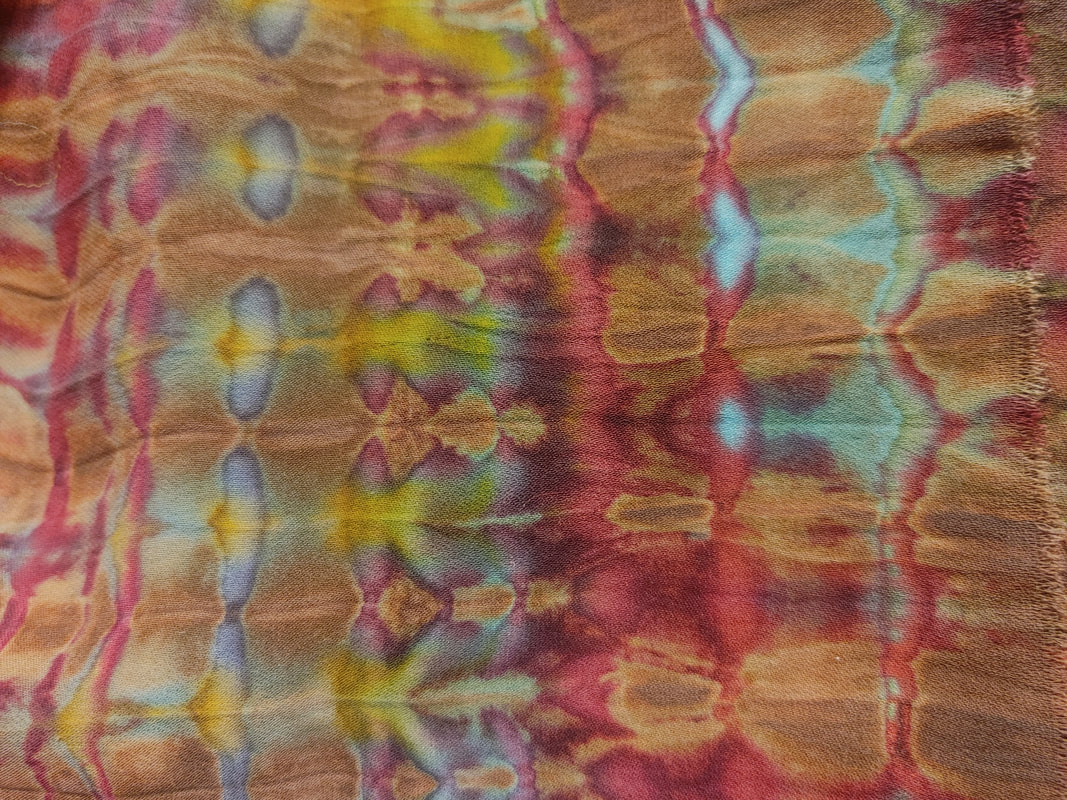 Aside from knowing when to stop, the only hard part is waiting for the paintings to dry to see what happens. Try it. It's fun and the worst that can happen is your paintings will turn to mud. Just remember color theory - opposite colors mixed together make dulled tones and browns depending on how much of each you use. In the event that you didn't get to take Wendell's class or another color design class, the opposites on a color wheel are yellow/purple, blue/orange, and red/green. Mixing the three primary colors (red, yellow, blue) can also result in mud so you may prefer to avoid those combinations at least at first. Just plop the colors in gently and let them do their thing. 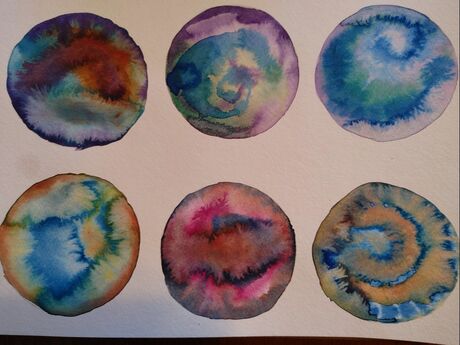 And for extra fun, here's a cute robot drawing by my 5 year old, Tyler, who just started virtual school. All teachers out there dealing with COVID - you are wonderful! Thank you for all you do! (Any software developers out there - please, please, please design easy to use software for teachers to use to teach effectively on-line without incessant bugs.) Best wishes and stay safe, ~ Sonja 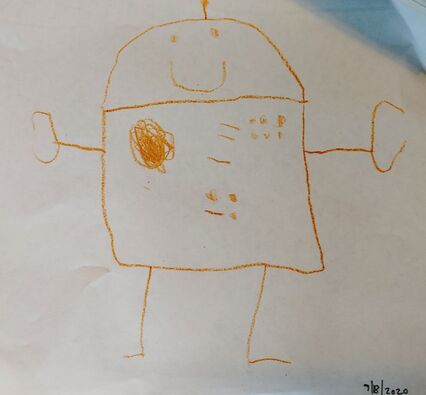 I ended my last blog post with a picture of my latest artwork, "Sanctuary" and a promise to tell the full story in my next post. Today I'll keep that promise. Here's a picture of the piece as I began to bring an idea to fruition.
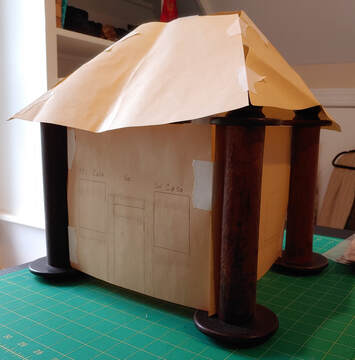
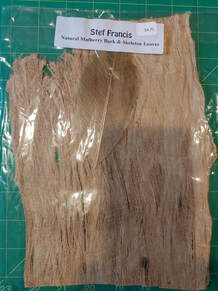
One of the things I had to figure out was how to make sure that it would stand up. I didn't want to make the sides too stiff. I didn't want to totally lose the softness and comfortable feel of a quilt. I also knew I'd want to be able to stitch through the walls to add words and other decorative elements. Luckily, I've had several old wooden bobbins salvaged from a Lowell, Mass. cotton mill sitting on my shelf for years. It occurred to me that they could function as corner pillars/trees/trellises to hold up the sides. So with this much figured out, I began to make the sides. 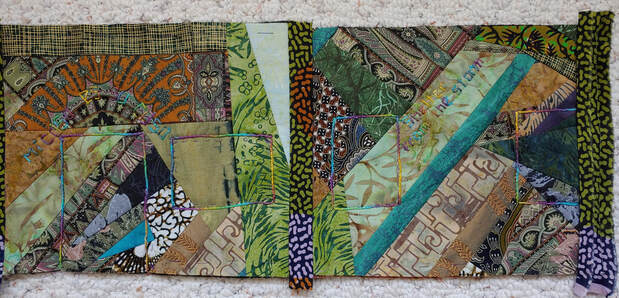 I created each side separately and then added strips at the corner. For the outside walls I used my pieced browns and greens to suggest a humble abode that would blend in with its surroundings. I put a flannel backing behind the pieced fabrics to give some body to them and stitched phrases on each side about my house and home...like "Mi Casa es Su Casa" over the front door and "You are always welcome here" on another side. I knew I was going to leave the door and windows open in my house. When you looked inside I wanted it to be very bright and cheery and welcoming. So I used a bright floral batik for the inside walls and floor. I stenciled more flowers on the fabric and embroidered more words of welcome all over the walls and floor. (See picture a little lower.) To hold the outside and inside walls together, I outlined the windows and door with a stem stitch through all the layers. I used some of my Stef Francis hand-dyed perle cotton to make it look decorative. Once that stitching was done, I cut out the windows and three sides of the door. After putting in the floor, I added tabs with snaps to the top and bottom of each wall corner to attach the walls to the 4 pillars. Then it was time to figure out the roof. I had the basic shape figured out, but wasn't sure how to make it stiff enough to stand up properly. Again, I had to allow for stitching on it. I had more words and phrases to add. For a second time, some of the supplies I've had on hand for years came to my rescue. This time it was mulberry bark (also from Stef Francis).
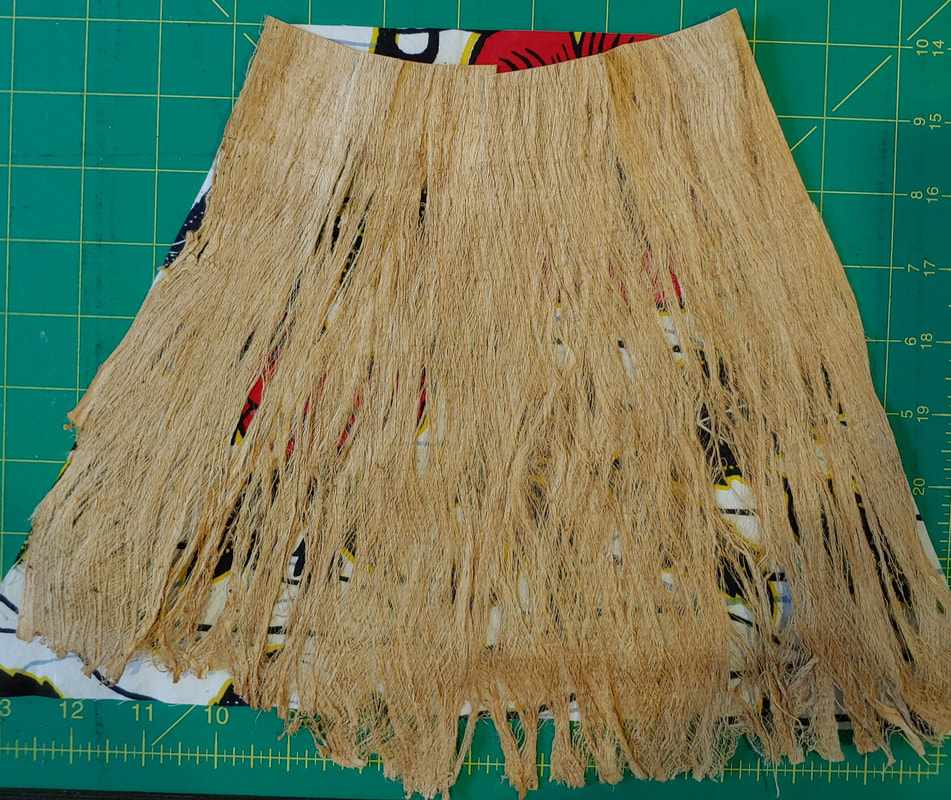
The mulberry bark is stiff, but can still be stitched through. And as you can see from the picture, the structure of the fibers allows you to stretch them apart. By stretching the bottom part more than the top I could just about cover each side of the roof with one piece. Besides having practical advantages, I liked the look of it. To me it suggested a little house in the tropics or an English thatched cottage so it was in keeping with my metaphor. To attach the mulberry bark to the fabric layer, I again used my Stef Francis perle cotton in a fly stitch and more words. I hoped that the mulberry bark alone would give sufficient structure to hold the roof up, but as you can see in the left picture below, it sagged. I ended up adding a support layer constructed from a stiff nonwoven interfacing. That worked out much better (picture on the right.)
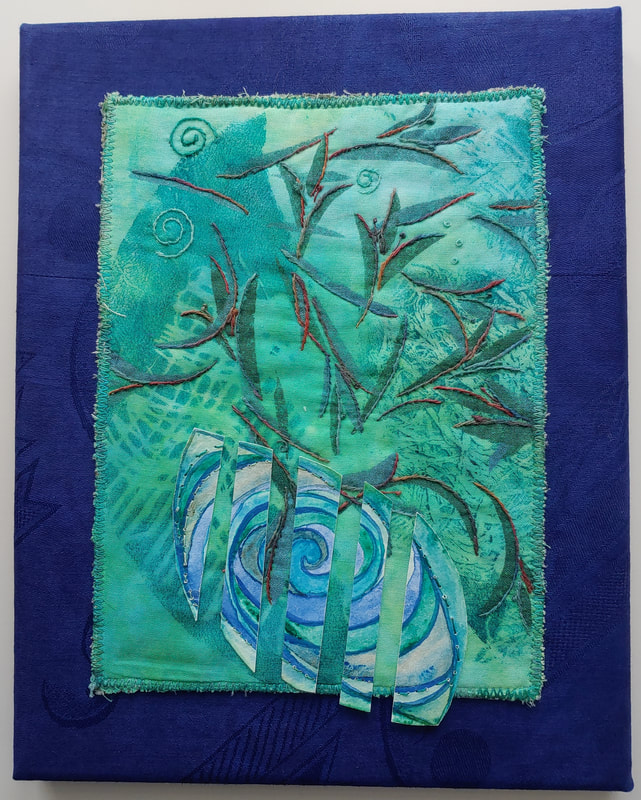
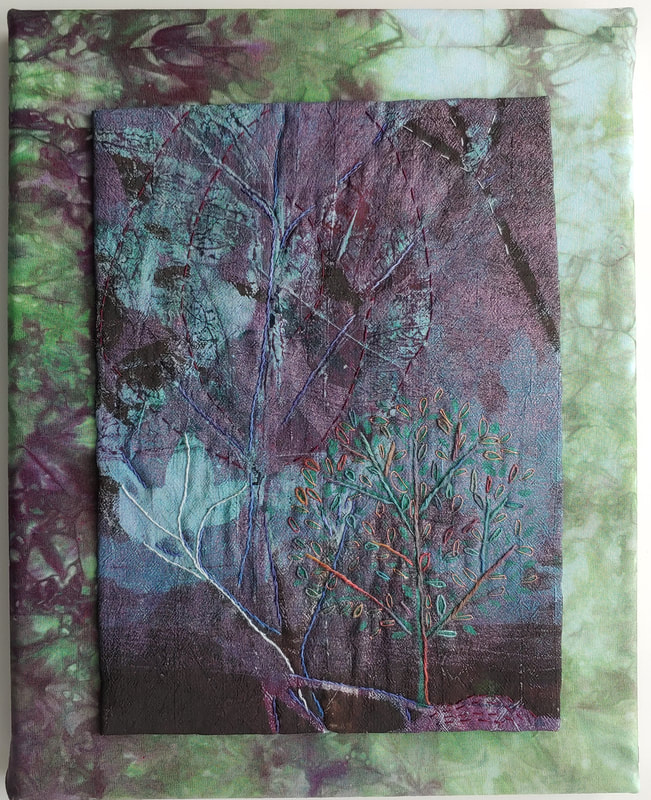
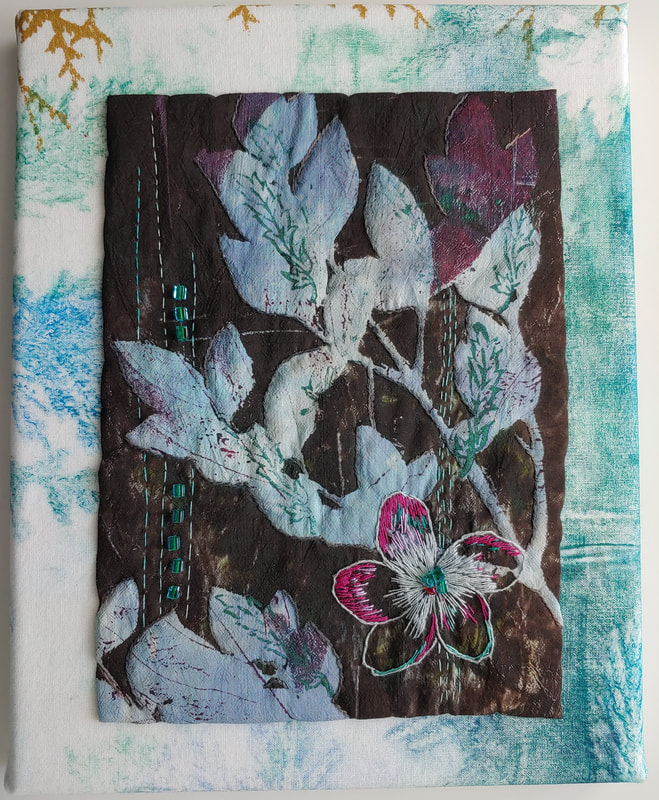
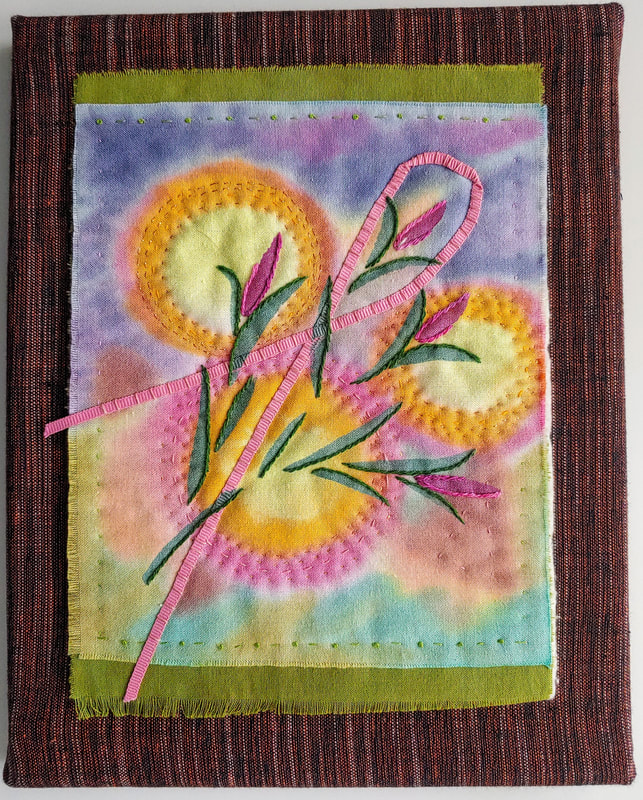
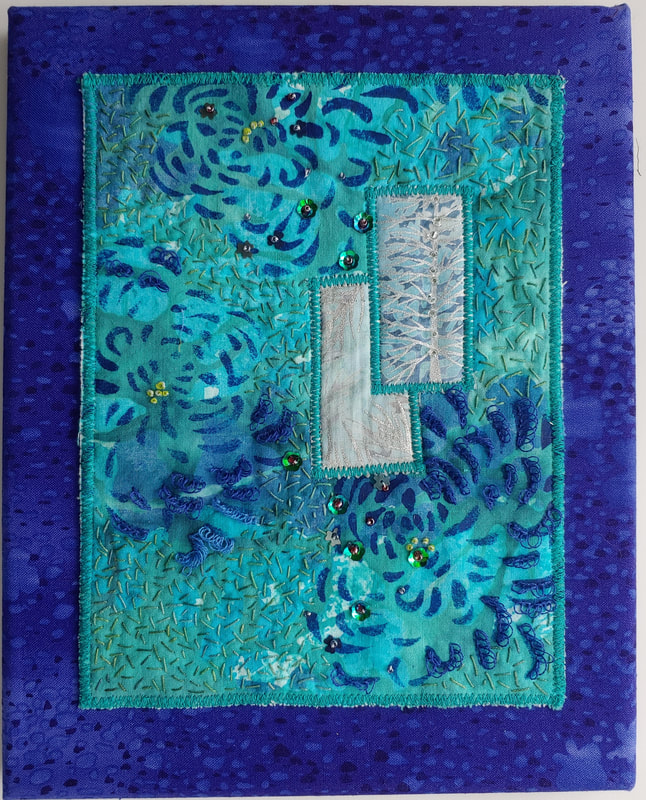
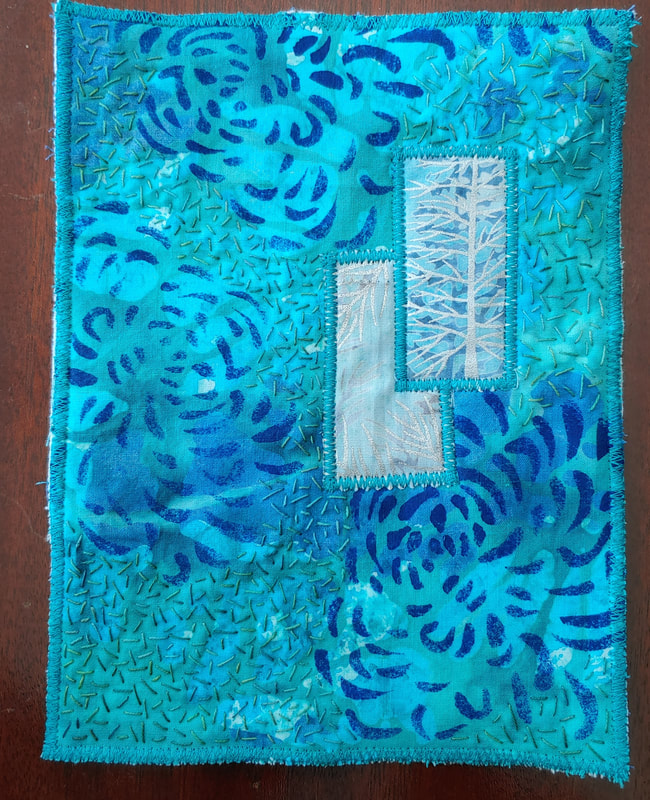
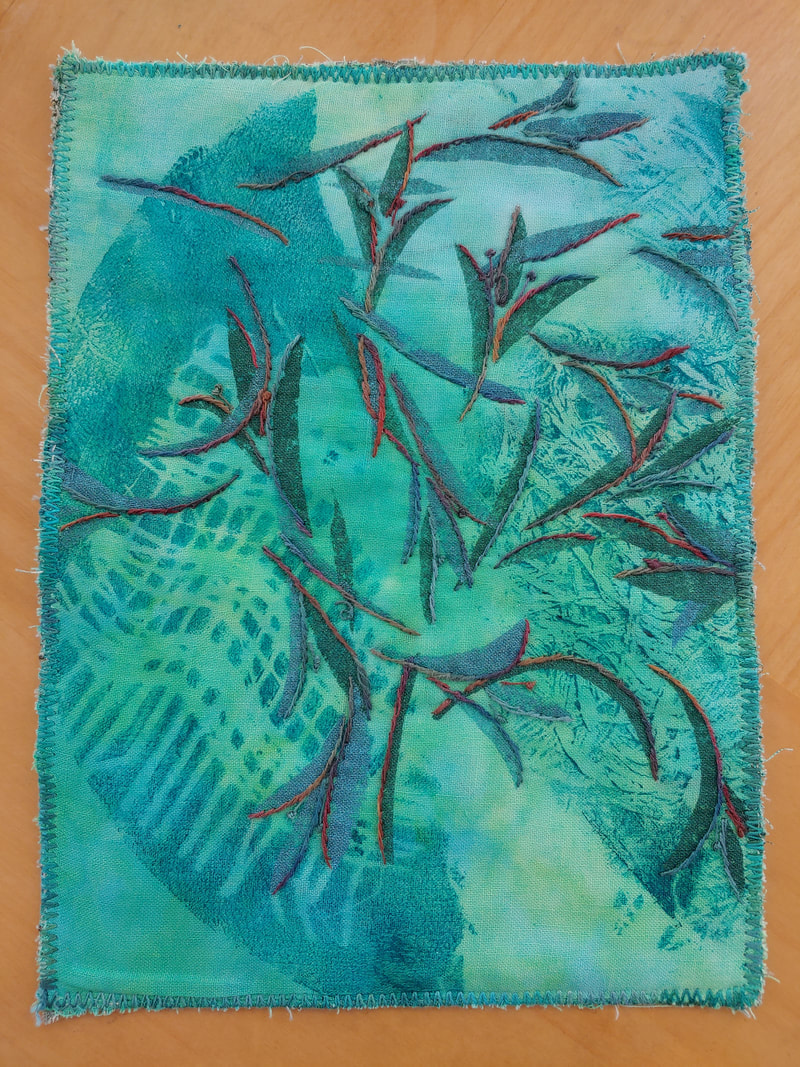
With the basic structure done, I was ready for the final decorations. I had already stenciled trees and bushes with embroidered leaves on some of the sides. I added more "bushes" by fusing on skeleton leaves in some places. Then I decorated the side pillars/trees with stenciled vines and finished up with wires and beads to suggest wisteria in the front. When I was nearly done with it and was setting it up to take some photos, I discovered something that I really didn't like. The inside of the house was really dark. It definitely was not projecting the warm welcoming look that I wanted so I realized that I needed to light up the inside somehow. I decided to use those little battery-operated LED tea lights, but had a heck of a time to figure out how and where to attached them. You can see my first idea - and the inside walls in the photo below. 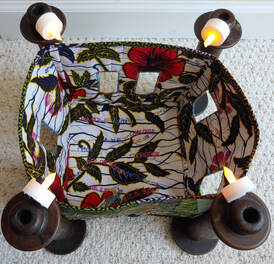 Attaching them to the pillars proved too difficult. I ended up putting little pieces of velcro on the bottoms of the lights and along the inside of the ridge-line of the roof. I wish they lit it up more, but that's a problem for the future. Sanctuary is not high art, but I sure had fun and learned a lot in the process of making it. I hope it will bring a smile to those who see it. Right now it's on display at the Stryker Center in downtown Williamsburg as part of the Williamsburg 2020 Community Art Project where it will be through the end of October. Stop by if you are in the area. It's right below the digital sign that displays a changing selection of poems written by Williamsburg area residents while at home during the pandemic.  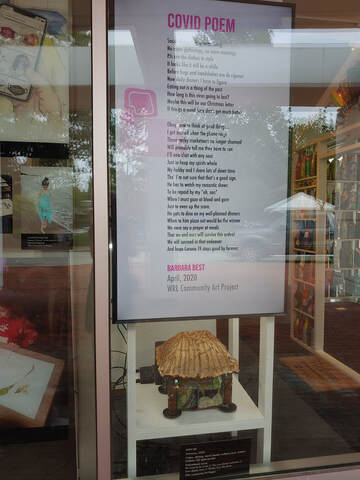 Our family has never believed the adage "You can't teach an old dog new tricks." My bricklayer father was over 60 when he learned how to build Finnish masonry heaters. These fireplaces are not only beautiful, but they allow you to heat your home with wood very efficiently and without polluting the air. He traveled the country building them for various clients and did such beautiful work that one of his fireplaces was featured prominently on the website for the Masonry Heaters Association at that time. He and my mother instilled that love of learning and trying new things in all of us. I bring this up because I'm finding that the Covid-19 pandemic is pushing me in new directions regularly. I'm grateful to my parents for having brought me up to embrace these things as opportunities, not bemoan the need for change. The most recent instance came in an email on Monday. This year's Occasion for the Arts - Williamsburg's biggest annual art fair - has been postponed until October 2021, but they have decided to try a virtual fair this year. Among the things they are recommending that participating artists provide are a short video about themselves or their work and links for live Zoom sessions to be held during the festival. So I will be spending time during the next couple of weeks to figure out the content and exactly how I will produce my video, plus the logistics for setting up my own Zoom account and meetings. This opportunity has made me think hard about how I can use these tools in other ways once I learn them. Without this kick in the pants, I know I'd have just gone on with business as usual. I'll keep you posted as I figure this out. Art Updates In my last post I told you about the new collaborative art project that Sonja and I have started with my sister, Sue Gilleland. I wanted to bring you up to date on that. We are currently on our third round and going strong. It is so exciting to see what the others add to your base. It's almost always something you never would have thought of yourself. (It's also fun to get "real" mail once in a while too.) The six works that comprised our first round are totally finished. Sonja and I mounted them on canvases and submitted them for the OurTown2020 exhibit curated by the Williamsburg Regional Library. They will soon be on exhibit at the Stryker Center next door to the library. I will post the details on our Events & Venues page when I have them. In the meanwhile, here's a preview.
Just a quick reminder - in each case the central image is 6" x 8" and the finished size is 8" x 10". There will be more to come on this project. Finally, here's a quick look at the latest work I completed on my own. It will also be part of the OurTown2020 exhibit. 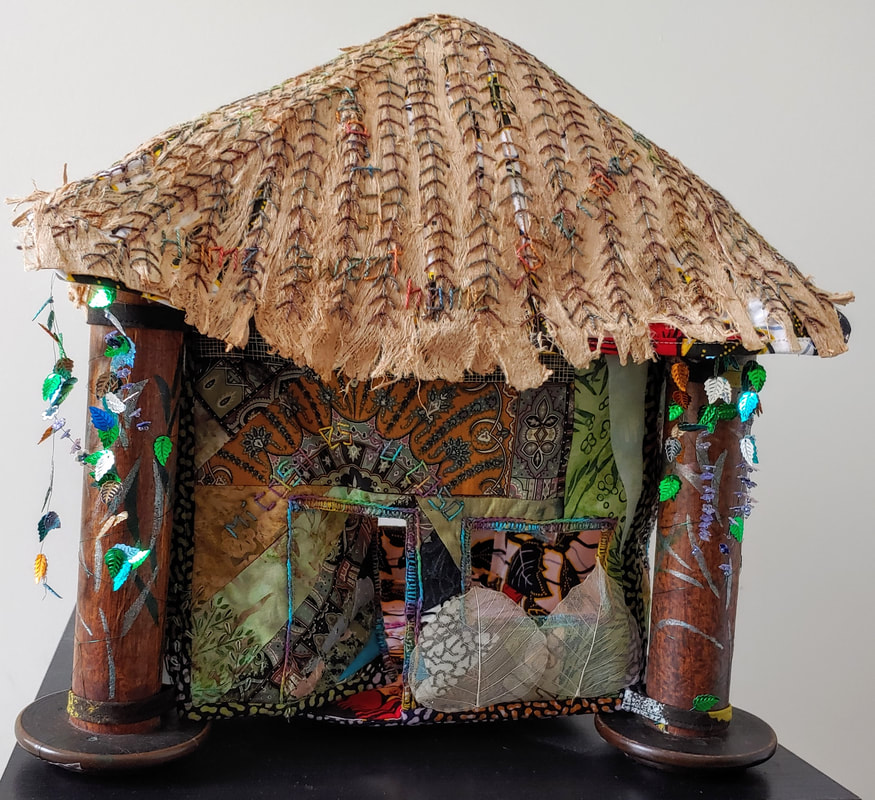 I call this one Sanctuary. I plan to do a separate post with the background story - hopefully soon.
In the meantime, wear your mask and stay safe and healthy. Cheers, Ann It's a rainy Monday morning. Perfect time to sit down at the computer and fill you in on the last month. As Sonja wrote last month, it's been challenging for her--working full time at home with a 5-year-old in the house. I've been helping out a little, going over for an hour or two each day to play with Tyler. It brightens my day and certainly keeps me on my toes. I never know what to expect when I walk in the door. I've been to the hot pepper planet, saved him from hot lava and a sea of slime, been the queen of electrocution one day and the queen of comfy another. He's always in charge, I just go along for the ride. And what a ride! On this day we were spies. He built our headquarters, complete with a one-way glass window and a key-pad entry system (using a little cash register to let you put in your pass-code).  As of today, I'm off duty again. Nick's school year is over so he's got Tyler duty for the summer. Then we'll see what the fall brings. Tyler is due to start kindergarten, but there's no definite plan yet for how or when the school year will start. While I've been home, I've continued to work on that king-size quilt I've written about before. I am making good progress. I have 8 (of 24) "squares" already quilted and the first 5 squares stitched together for the left side of the quilt. The quilt as you go method is working out well for me. Each section presents new decisions for what to do in terms of embroidery/quilting and gives me a sense of completion when it is finished. Here are a couple of the most recently completed squares. (The number tags indicate the upper right-hand corner and the order for putting them together.)
 In addition to this project, which is purely personal, I've also started a collaborative project with my sister, Sue Gilleland, and my daughter, Sonja. This project arose from an article I saw in the most recent journal from the Surface Design Association. The theme of the issue was collaboration and one of the articles was about The Wondermakers Collective. Everything about their work resonated with me. The two women, Mindy Sue Wittock and Jenna Freimuth, are from Minnesota and Wisconsin. (I grew up in Minnesota and my husband in Wisconsin.) They create these vibrant embroideries by sending the works back and forth in the mail, with each one adding to what the other has done. When I read about it, I immediately thought that it would be fun for Sonja and I to do something like that. And then a couple seconds after that I thought it would be fun to include my artist sister, who is currently living in Anchorage. Sonja and I talked about it in one of our art nights and figured out some parameters which we proposed to Sue. She approved and we got started. Here are our "rules," such as they are:
There will be more to come on this project. We haven't finished with the first set of six, but we've already decided to keep going. No decisions yet on how long we'll do this or what we'll do with the finished ones. Main point right now is to have fun; staying connected by making art together. Both become more important with each passing day.
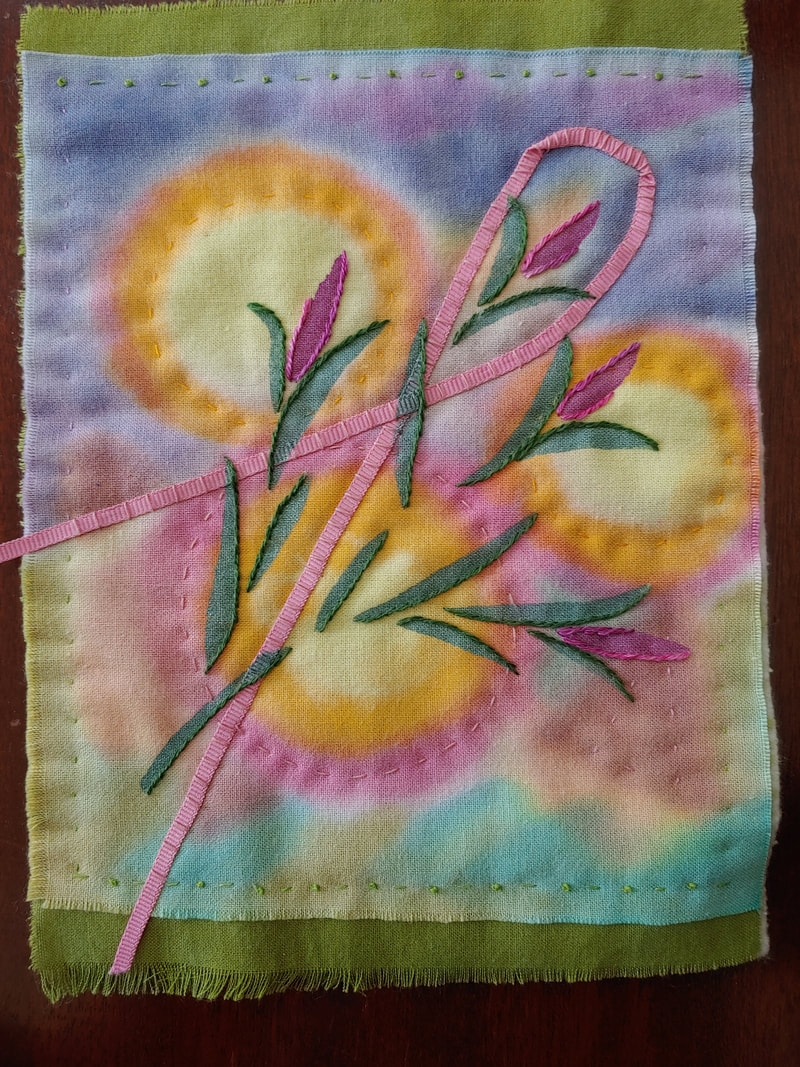
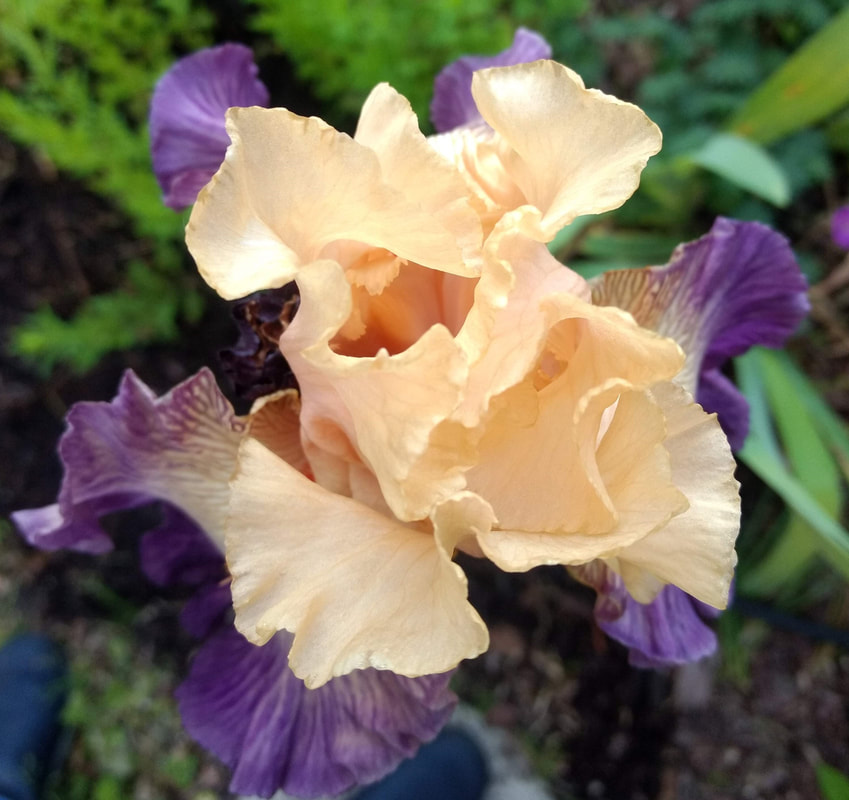
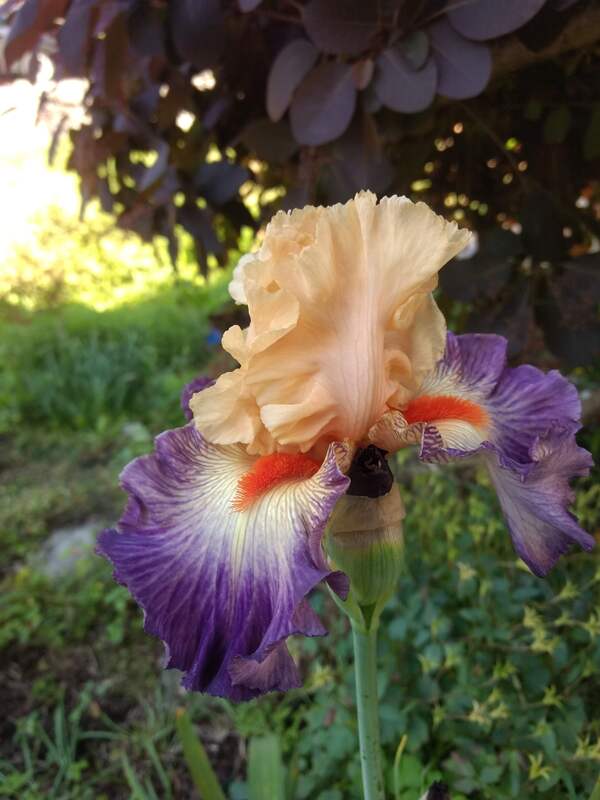
I hope you are also making time for fun and social connection too. All my best, Ann This weekend our family theme was Silly Tickle Days. I realized since we are home pretty much all the time, we needed some way to clearly differentiate the weekends from work days for our 5 year old son, Tyler, and for me and my hubby, too. Working at home has been interesting. Try talking "professionally" about work on the phone when a kid is climbing over you. My coffee went flying on Monday because I tried to pick Tyler up off my office chair and he kicked the coffee mug while wiggling. One of the challenges has been trying to convince Tyler that Mommy can't have playtime all the time with him. The other big challenge is attempting to convince him to get dressed and not stay in his PJs all day. Everything I try seems to be only a temporary fix - other than letting him play games on his Kindle which he will do all day (in his fuzzy monster covered PJs), if we let him. 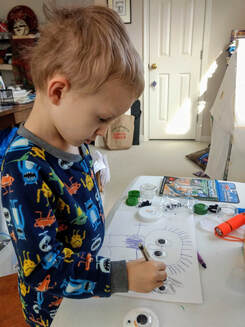 Some days he is perfectly happy to play Legos most of the day all on his own. When he does that, he makes the best stuff. Other days the refrain is "Mommy play with me" (in a whiny voice). So anyway today started and ended with tickle time. The weekend was also filled with random moments of silliness. Silliness creeps in other days lately, too. We've been composing our own verses to the tune of Parry Gripp's catchy "Baby Yoda (Floating in a Pod)" song. Made up verses usually revolve around our newest family member, Leo the dog. Try it, it's addicting. Warning - the song's tune will get stuck in your head! It's a super easy tune to make up words to. Here are some Leo verses for example: Leo, Leo, wants a belly rub. Leo, Leo. Leo, Leo, going for a walk. Leo, Leo. For silly artwork with Tyler, we drew a monster with glasses for all three eyes. Tyler has also been putting googly eyes on everything. 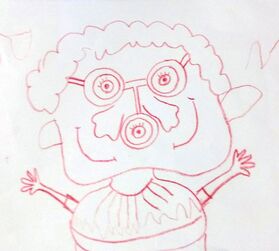 Tyler also decided to take goofy photos and star in his own silly video clips using my phone today.  On top of that, some irises opened up in the garden that remind me of clowns because they have the most vibrant orange and purple colors with frilly petals like a clown's color. Happy Silly Tickle Day!
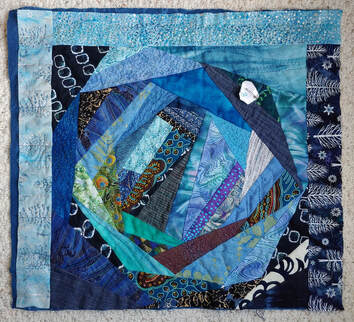
Sonja Time to take a break from my sewing and fill you in on my progress on that king-size bed quilt I talked about in my last post. As I mentioned then, once I had settled on this project I decided to just jump right in with only the most general plan for what it was going to look like. I thought I'd share some of the fits and starts of this "figure it out as you go" process. Perhaps some of you planners would like to give it a go and what I've learned can help you. I'll try to include any details that I think might be helpful to you. It's definitely iterative: start forward several steps; check your progress; make corrections; move forward again for a while. I've tried to check my direction often enough that I didn't end up forced into a direction I didn't want to go. My original plan was to create random-sized squares of my random-pieced blocks and fit them together however I could. I had a bunch of blocks already made, but needed lots more. I dug out all my scraps of "blue" fabric and kept piecing. One rule for selecting fabrics was that they either "read" primarily blue or picked up on colors in the other blue patterned fabrics. A second rule was that the fabrics had to have been used in some other project; I wasn't going to use previously uncut fabrics. The point of the second rule was to use up scraps. The unintentional result was a trip down memory lane as I pieced the blocks. I dug to the bottom of my stash and came up with fabrics I hadn't seen in years. I began thinking about where the fabric came from, what it was for, and what happened to whatever I made with it. It added another level of joy to the process. 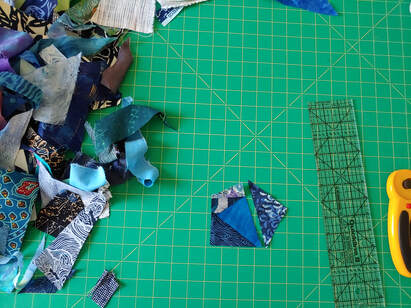 When I am doing this random piecing, I keep a pile of scraps of various sizes on my cutting board. I try to keep them sort of "organized" with the smallest ones nearest to me and larger ones toward the back. Obviously though it's mostly a jumble. I pile in more as the pile starts to go down. I start each block with one of the smallest pieces and begin building out around the edges, sort of long cabin style. I like to start with an odd shape or a triangle, rather than a square because I am going for an irregular look. I decide what to add on where based on what fits and looks good next to the fabrics already there. I try to add on the smallest piece I can to waste as little as possible. I use narrow seams, 3/8" to 1/4." Consistency on the width is not important in this method. After each short seam, I trim the seam allowances if need be and press the seam--usually away from the center, This is definitely not a speedy process, but I like the rhythm of it. (Also, I figure I need the exercise of getting up, walking a few steps, and sitting down again; over and over and over--especially now.) 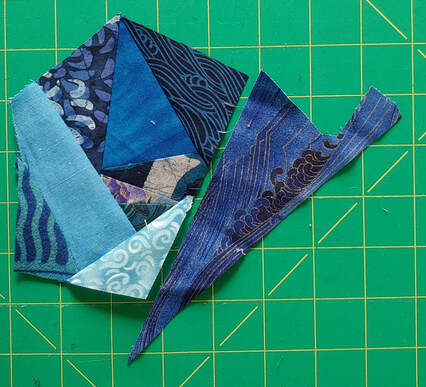 I think you can see just from this small bit that I use a WIDE variety of fabrics. They are almost all cottons, but there are a very few silks and a few unknowns. I learned early on that when you are cutting fabric up into smallish pieces, the pattern becomes almost irrelevant. The more patterns included, the more they blend together into something new. Then it becomes fun to look at the results closely to see the elements individually. 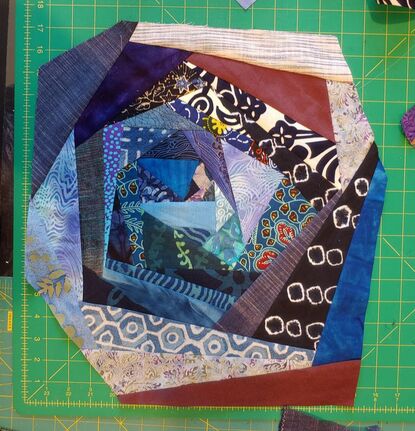 I keep adding to the sides, trying to keep the pattern as irregular as I can until I am getting close to the size that I want. When I am within 1-2" of the dimensions I want, I begin to figure out how to square it off. I line up one of the edges, usually the longest, with the 0 line on the bottom of my cutting board and widest point with the 0 line on the side. That shows me where and how much to add. I try to square up one side/corner at a time. As I mentioned, my original plan had been to make enough random-sized pieces to cover the bed. I'd just fit them together as I could. After creating perhaps 10 squares, I decided I should check on my plans. I did another round of laying them out on the bed to see where I was in terms of how far along I was and how hard it might be to put them together. Lucky I did. I realized that putting together bunches of random-sized blocks would be really difficult. (L seams are not impossible, but they are definitely harder and I didn't want to have to do a whole bunch.) I also realized that the final size I'd planned on (based on a google search of quilt/bed dimensions) was larger than I needed. So I took a step back and actually made a drawing of a layout that would work. I decided on 3 basic sizes for the width of my blocks. Most of the blocks would be square, but I needed a few rectangular blocks to fill in spaces at the bottom. Once I did that, I had a clear plan of how many squares I needed and how I'd put them together. Some of the blocks that I had already made were smaller than I needed, but it was easy to add on to bring them up to size. I also had a couple that were larger than I needed. Instead of just cutting them down to size, I cut them into quarters and used them as the centers of new blocks. 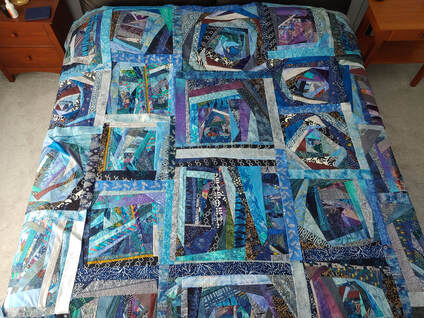 So I kept piecing, and piecing, and piecing, till I covered the bed. I laid them out once again rearranging them until I was pleased with how they went together. Then I pinned numbers to the upper right corner of each block to indicate the order for sewing them together. I bought a big piece of black cotton batting and cut backing squares from the duvet cover I am replacing. Then I had to decide about quilting it. I had already decided on using the quilt-as-you-go method, thinking to do machine quilting. I don't have a long-arm machine and the object of this project was to keep me busy. So sending it out to be quilted was out of the question. But when I got close to actually starting, I had no idea what to do. I have basically no experience with machine quilting and I began to think that any machine stitching I'd do at that point would only detract. I mentioned my dilemma over dinner one night and my husband suggested hand quilting. I'd been resisting that idea because machine quilting would be faster and hand-quilting is always my default. The suggestion did plant a seed that maybe going to my default is okay. It's not like I have a deadline for finishing, or any other pressing project to attend to. Then, when I picked up the first square and it was decision time, the answer was obvious. I took one look at the block and had a bunch of ideas for embroidery stitches that would coordinate with and enhance various patterns in the cloth. I pulled out 8 or 10 spools of Oliver Twist hand-dyed variegated threads and got to town. Here's the first one--the full block and a detail shot. In addition to traditional quilt stitches, I've got lazy dazy, chain , stem, straight, chicken, and herringbone stitches. May be more.
Just 23 more to go! I thought about just hand stitching every other one, but I had such fun with the first, I decided to just go all the way. It'll be done when it's done.
I've found a way to make my stay-at-home time productive and enjoyable. I hope you have too. Stay well. Ann |
AuthorMother & daughter, Ann Lee & Sonja Lee-Austin share their joys and struggles in their art and lives. Archives
June 2021
Categories
All
|


 RSS Feed